How to add Amazon Connect chat to your website
Until recently adding a Amazon chat interface to say your public website use to be a bit of a task but now there is a simpler way.
Amazon Connect is a omnichannel contact centre solution allowing you to interact with your customers via both phone and chat.
Until recently adding a Amazon Connect chat interface to say your public website used to be a bit of a task. This involved basically building your own chat UI. (Here is some examples to help you go down that path).
Now this is still a great way to go about doing things if you need a customised integration with your application but if you need a simple integration there is now an easier way.
Configuring the Chat Widget
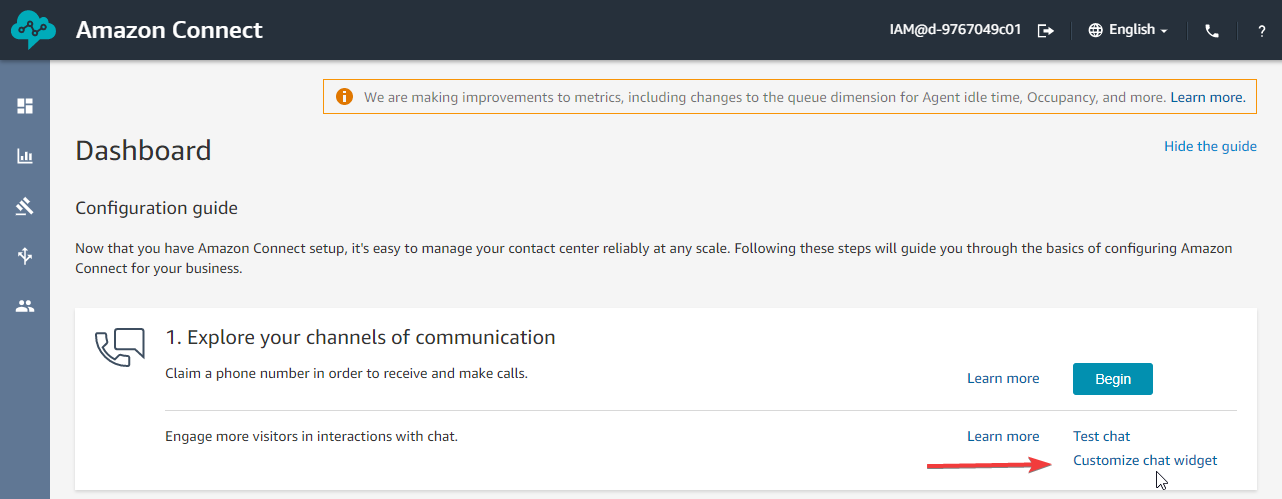
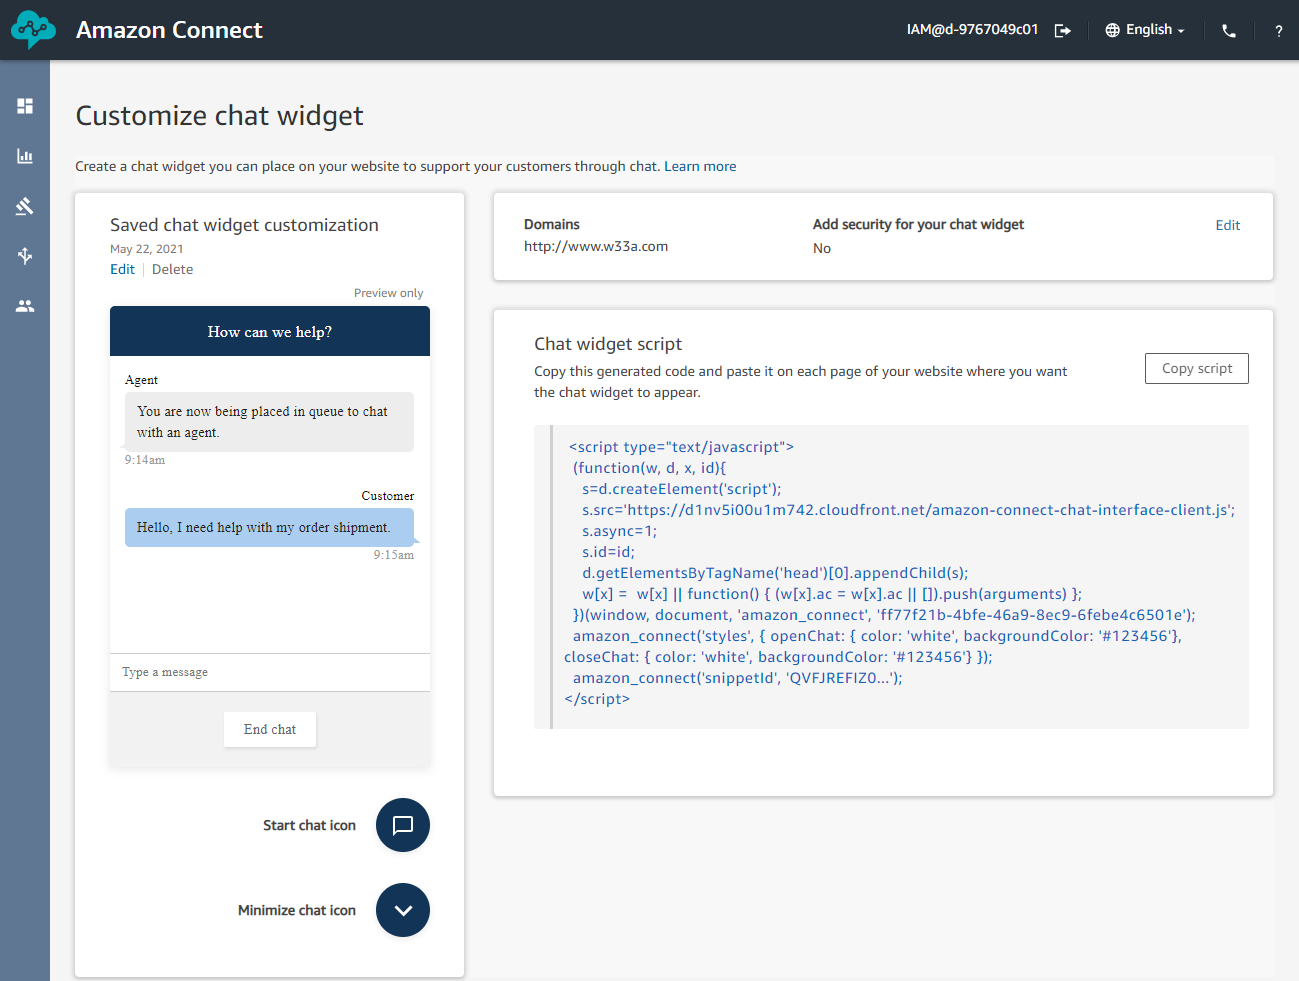
In your Amazon Connect console, go to the Dashboard. On the Dashboard click Customize chat widget
In this wizard you can customise the look of the chat widget. This allows you to change the colours to match the website you are adding the chat widget too.
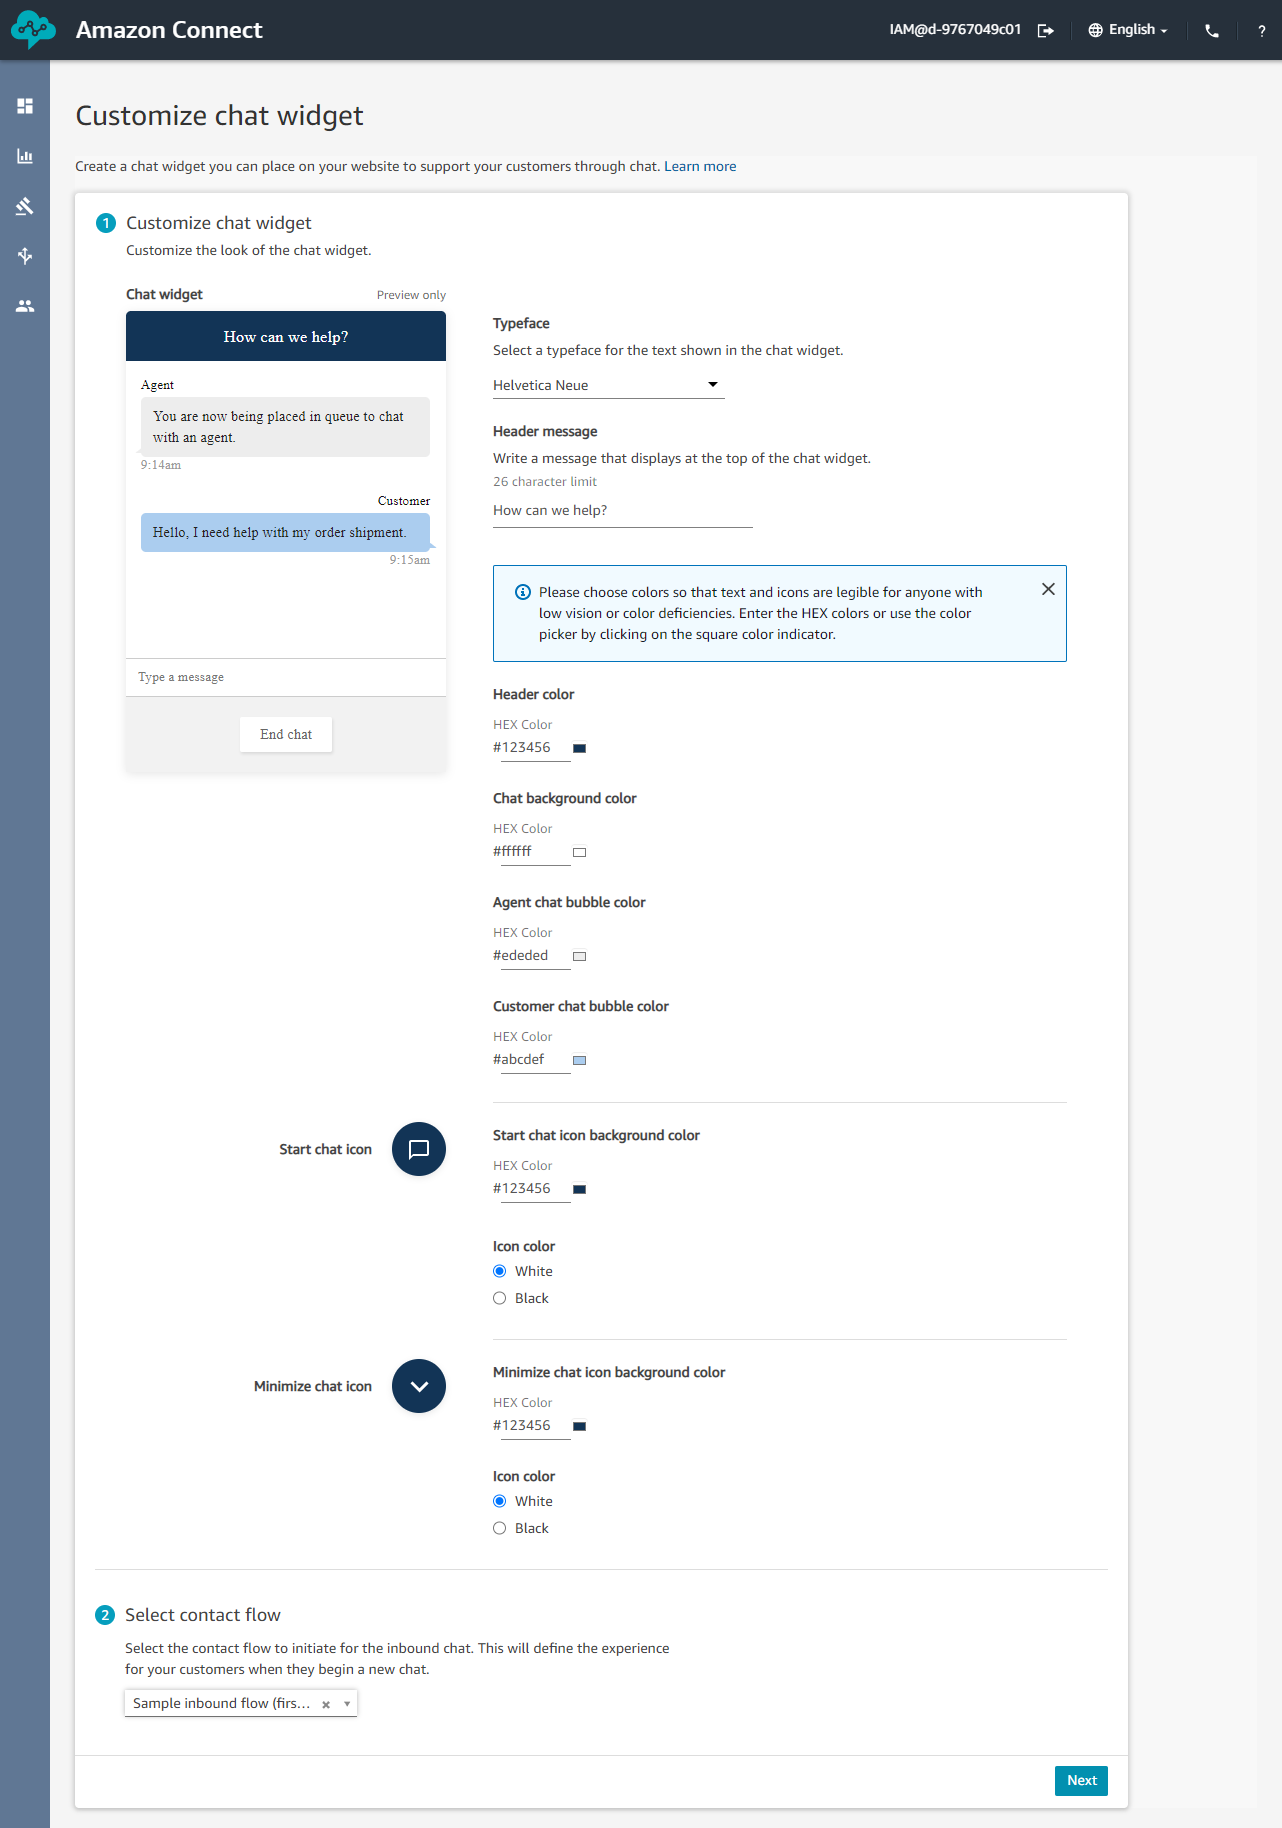
Once you've customised the look of your widget and selected the contact flow you will be using for this inbound chat, click Next.
On the next screen we need to specify the domain this chat widget will be placed on. The chat window will only load on domains you've specified in this step.
You can also further increase security by using a JSON Web Token (JWT), I won't be doing this for the sake of this blog post but you can read how to implement this here.
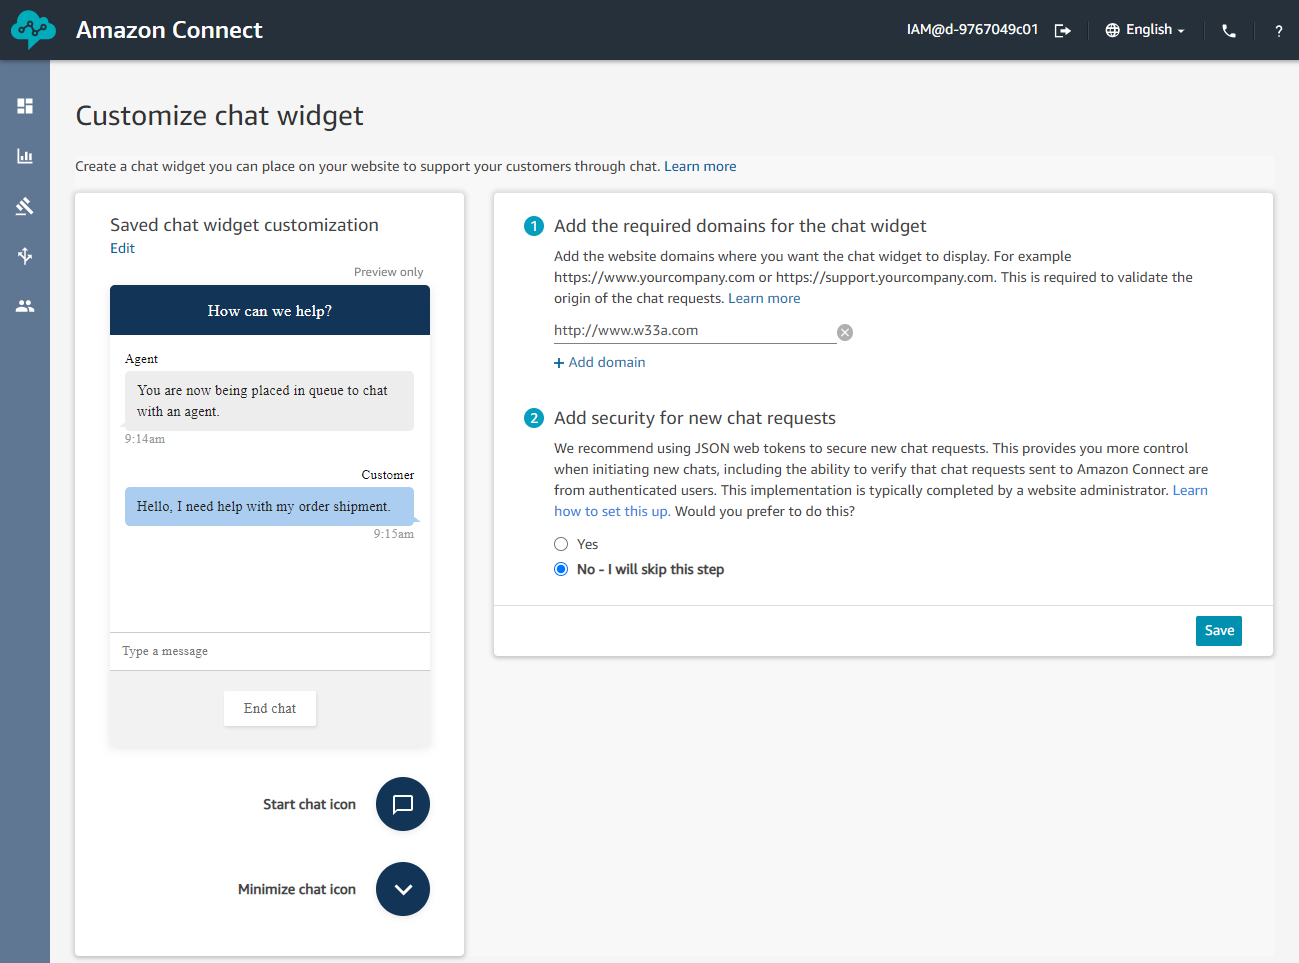
Once you've added your domain(s), click Save.
The wizard will now generate us our widget script that we can use to embed the chat widget on our website.
Adding the chat widget to your website
Now I'm going to be adding this Chat widget to a demo WordPress site I quickly spun up on Amazon Lightsail.
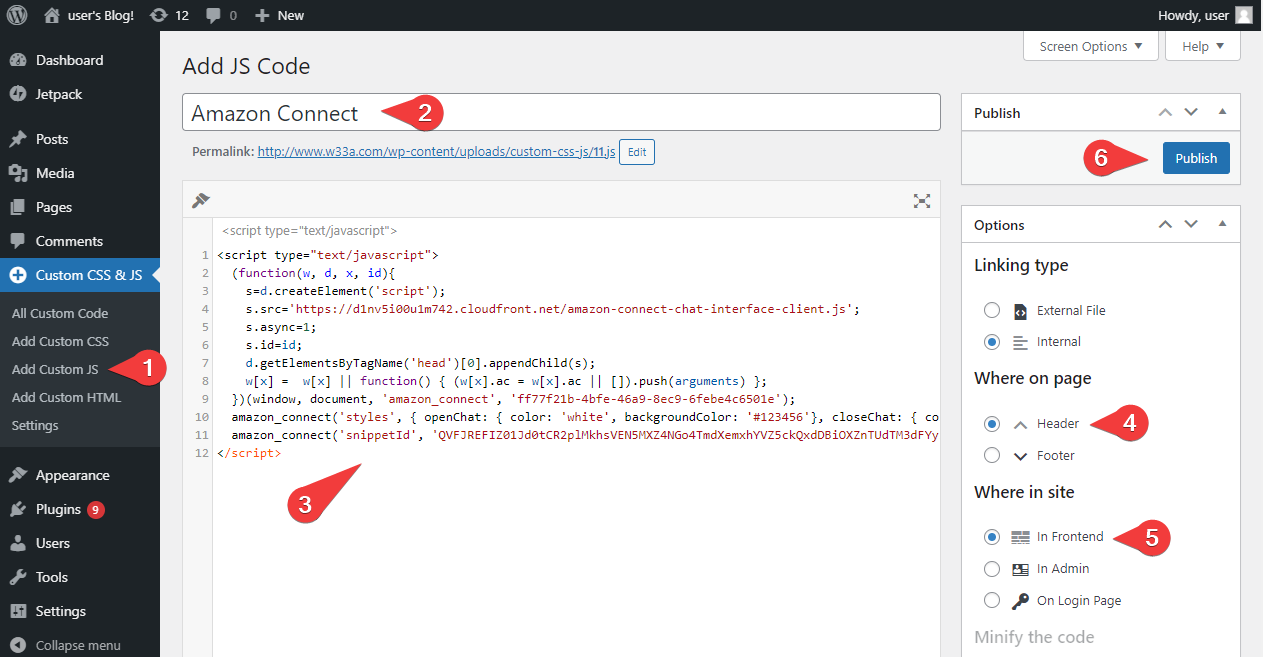
To avoid having to explain how to modify WordPress themes, I'm going to use the Simple Custom CSS and JS WordPress plugin to add the JavaScript code to the WordPress site.
I've just picked this plugin after a simple google search but you can use any plugin you would like to add the JavaScript code to your WordPress site or modify the theme if you know what your doing.
In the plugin we simply need to:
- Click Add Custom JS
- Give the code a name
- Copy and paste in our custom JavaScript code from the Amazon Connect chat widget wizard
- Select Header
- Select In Frontend
- Click Publish
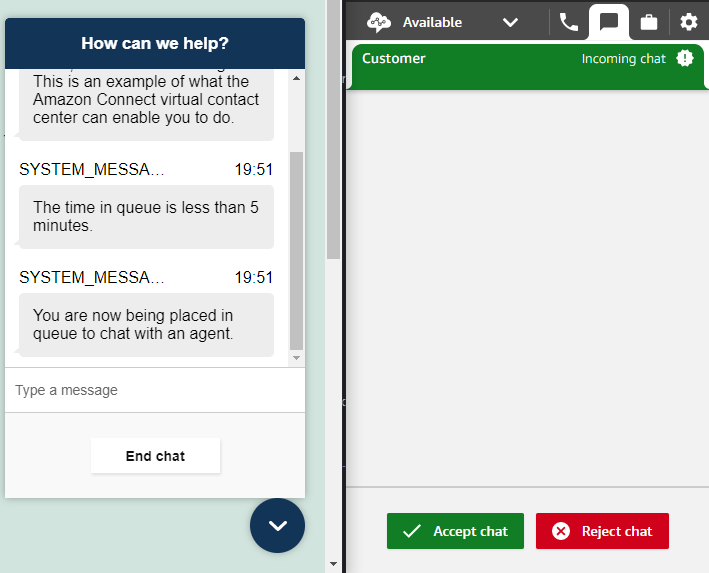
We have now deployed our chat widget to the WordPress site. (Yay!)
Clicking on the Widget Icon opens and starts our chat and then interaction with our agent (or even a Amazon Lex Chatbot)
As simple as that, we have enabled our website with Amazon Connect ready to help service our customers.