Amazon Connect - On-demand contact centre in 10 minutes

Over the last few months, the world has changed dramatically. Next week I will have been working from home for nearly a month due to social isolation requirements.
The way people are working is changing and the ability to do your job from home could mean everything to either your internal staff or customers.
One place I’ve been helping people with recently is their contact centre. A lot of companies are still reliant on their on-premises phone systems to provide voice services and as a lot of people are finding out, these PABX systems either suck using it remotely or just can’t cope with the level of demand staff or customers are putting on it.
Welcome to the stage, Amazon Connect. Connect is an omnichannel (voice and chat) cloud-based contact centre. It lets us get up and running super fast (I’m talking 10 minutes fast) and can scale to as big as you need it (If you have a look at the service quotas, there aren’t many that can’t be increased) .
The most awesome feature about Amazon Connect is that you can integrate it work AWS Lambda, which means you can pretty much do anything you want. Some other cool features include:
- Call recording to Amazon S3
- Integration with the ML/AI suite such as Amazon Lex (chatbots)
- Integrated identity management allowing your agents to login with their standard credentials
Whats the catch?
Amazon Connect is a contact centre solution, it is not a 1:1 replacement for a phone system. You can't connect a SIP phone to it for example. If you need to take lots of calls (or chat) and send it to your agents. AWS Connect could be for you.
Let’s see what it takes to get a basic support contact centre queue going.
Amazon Connect Instance
In the AWS Console, let’s go to Amazon Connect and click Get Started.
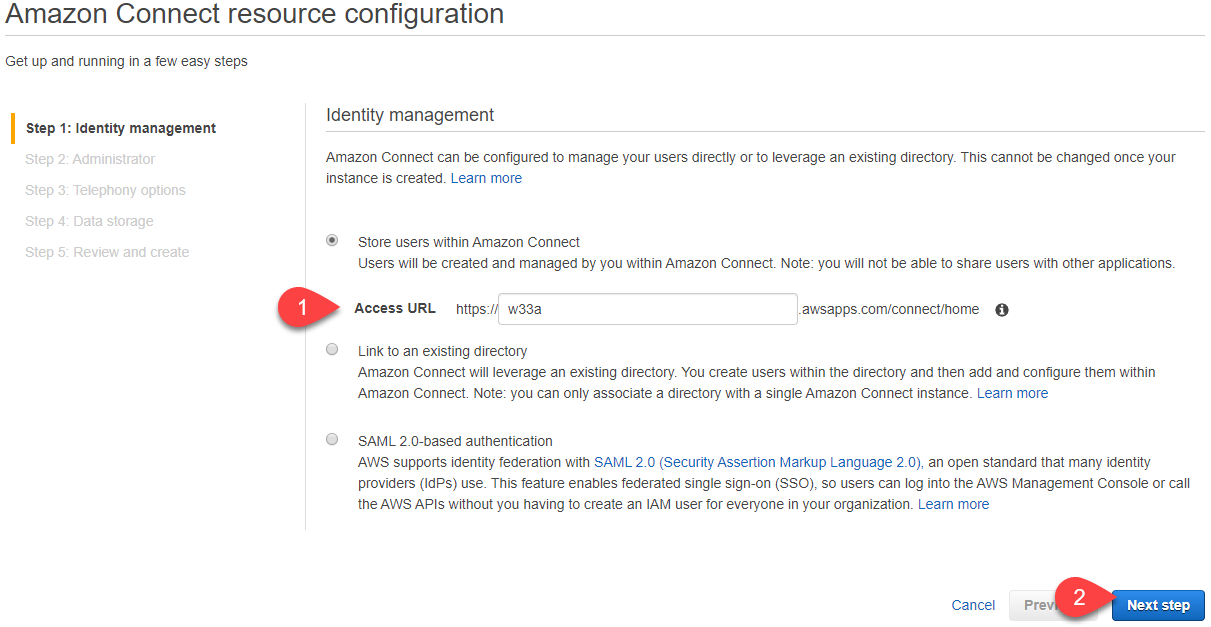
Next, we need to configure our identity management. In this example, I’m just going to use a new directory but if you have an existing one (such as Active Directory) or want to use SAML, you can do that here.
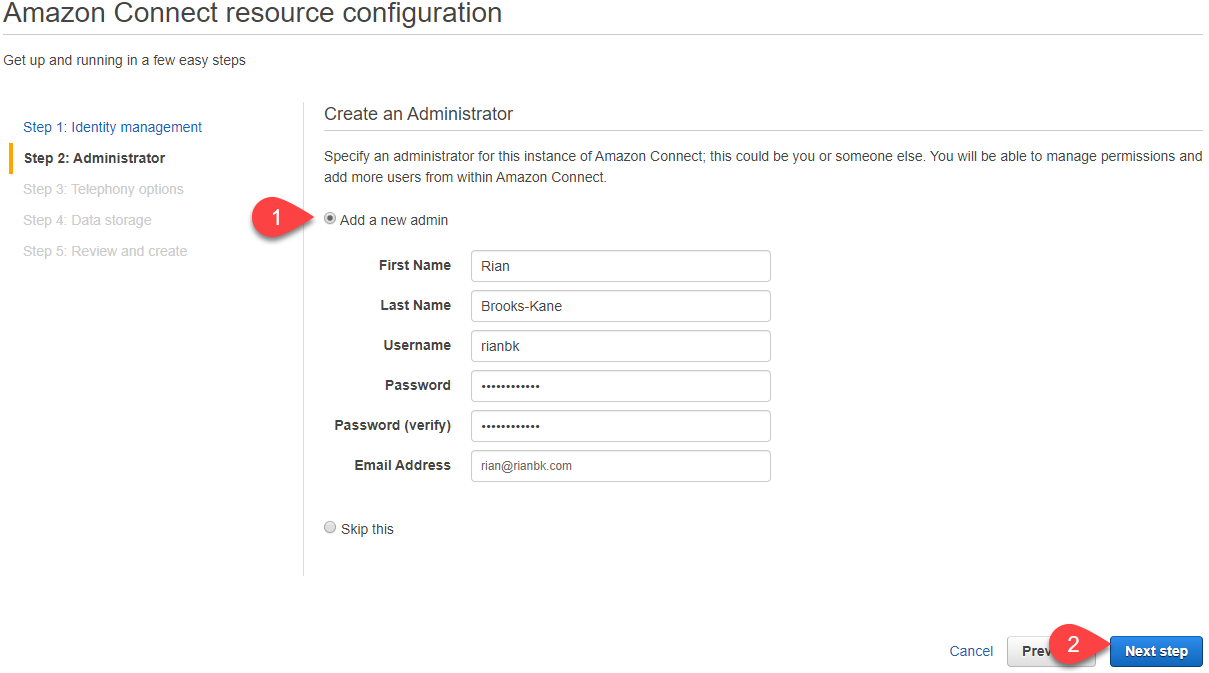
Next, we need to create an administrator user.
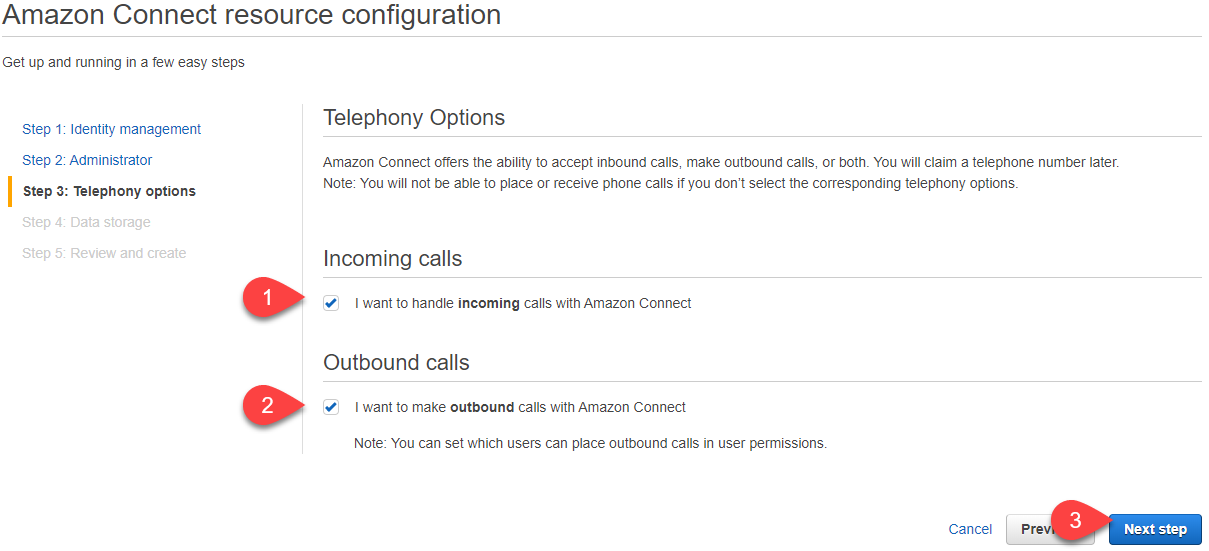
Then we need to configure our Telephony Options, here we can select if we want to allow incoming or outgoing calls (or both). I’m going to leave it as both.
All data produced to Amazon Connect is stored in S3. In the Data storage settings, you can specify where things are stored and how they are encrypted.
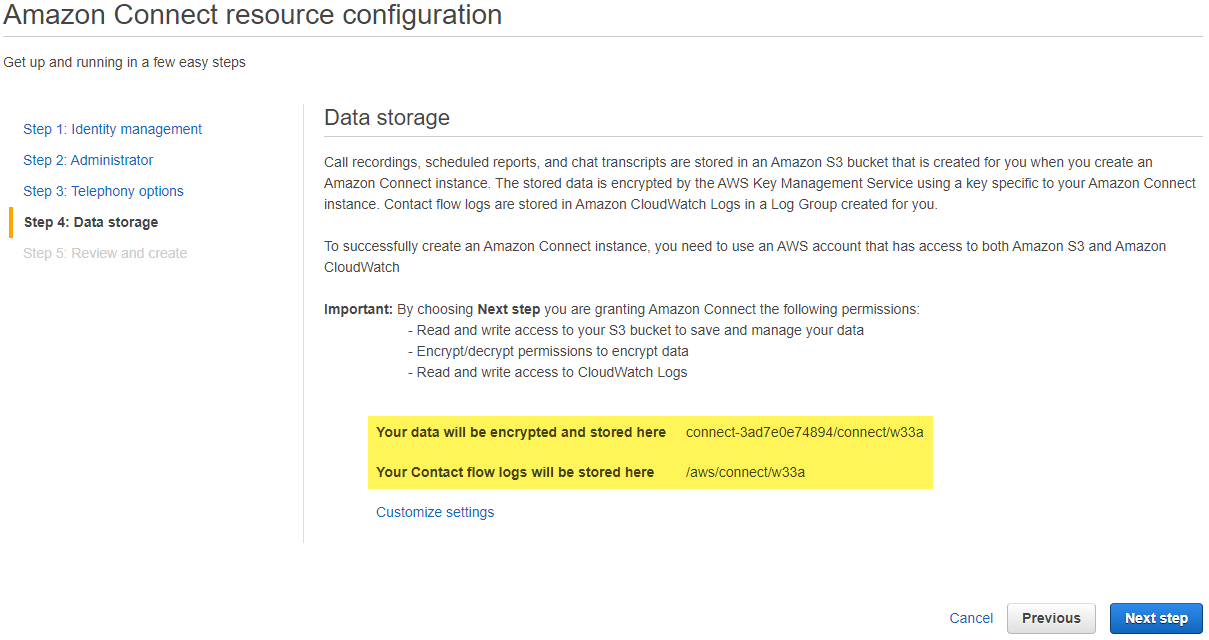
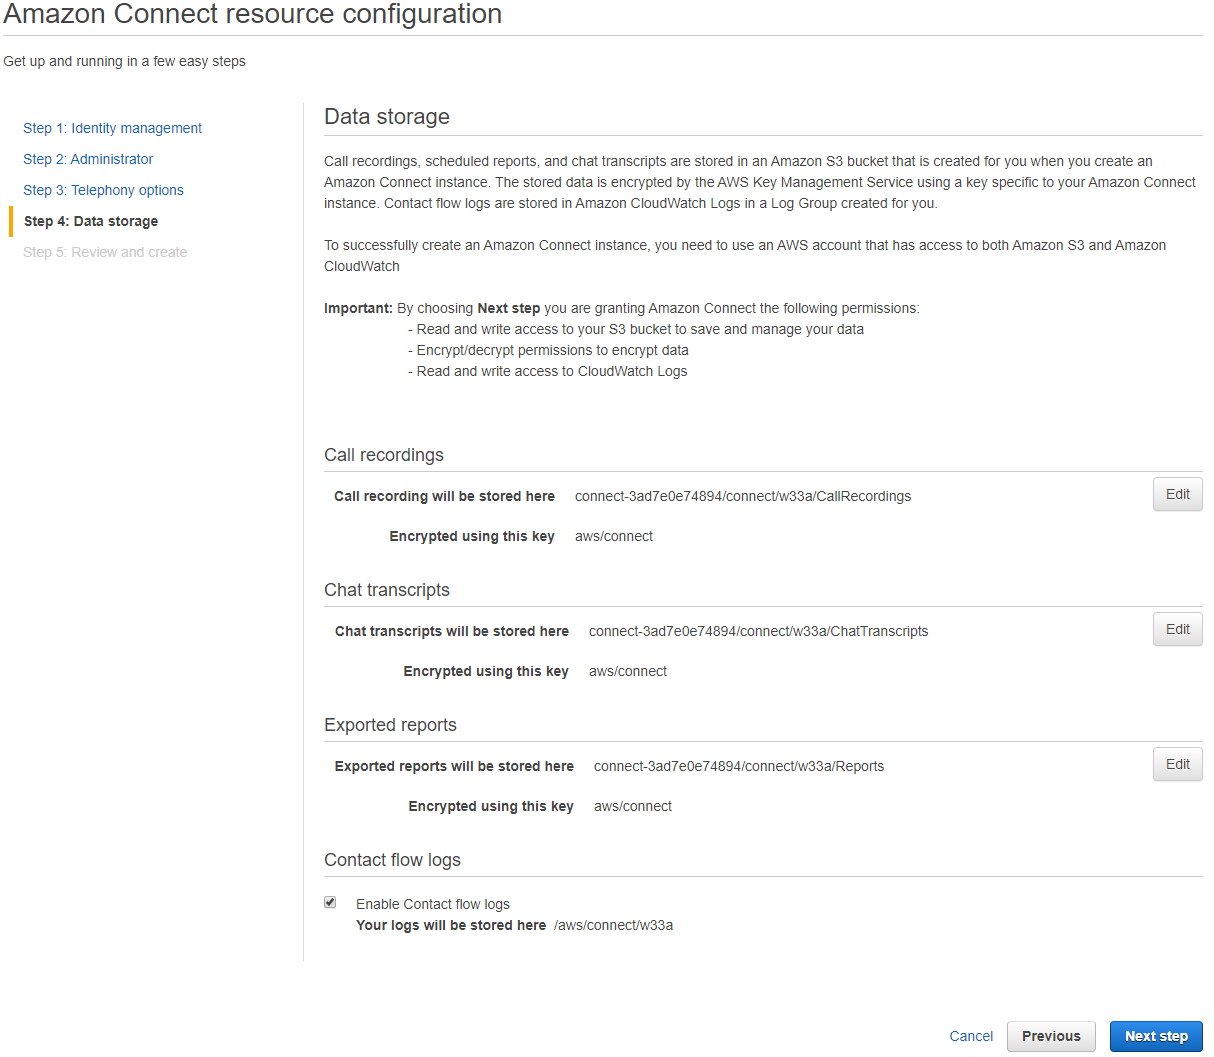
Clicking Customize Settings gives you finer granularity for the data styles.
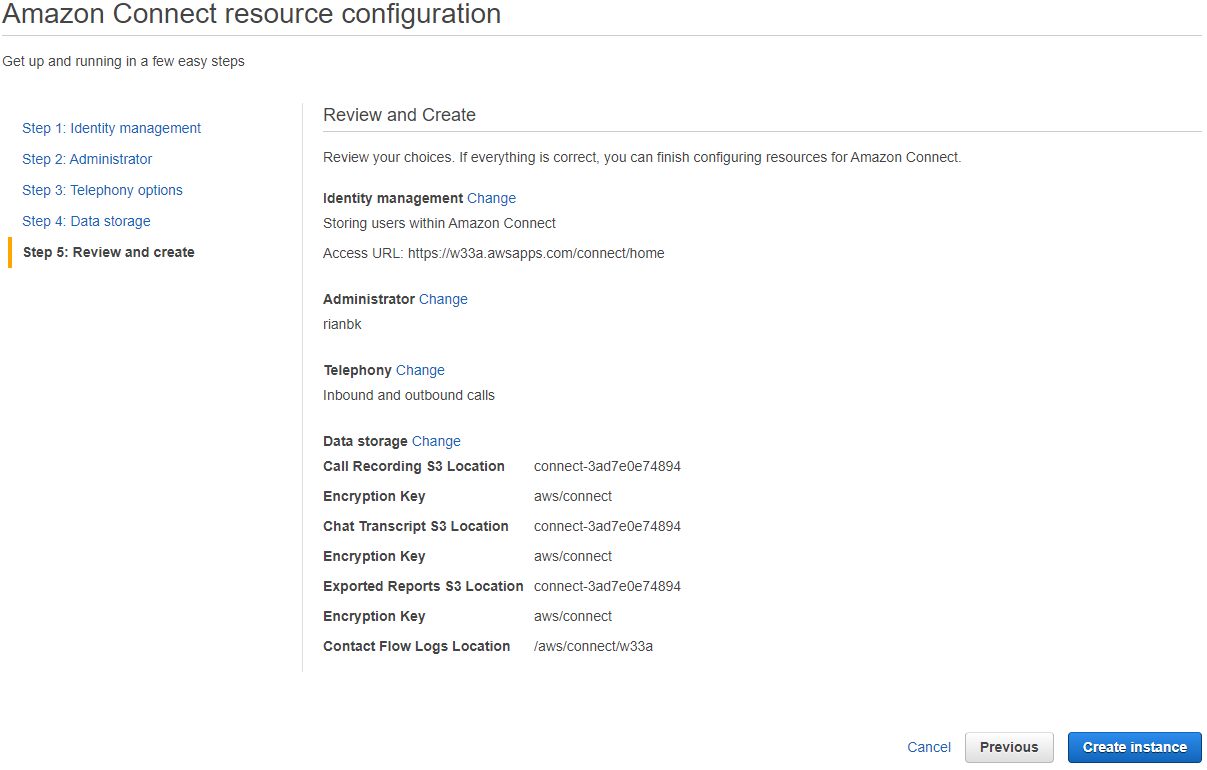
Once we are sure about our settings, we can create the instance.
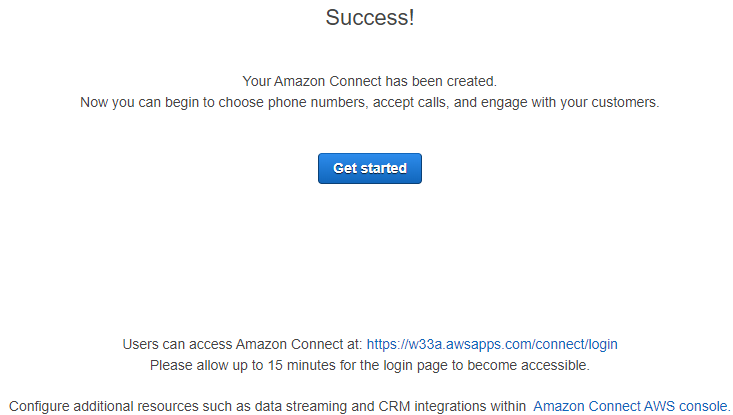
This only takes a few minutes.

All Done!
Base Configuration
The getting started button will take us to the control panel for Amazon Connect. Note the user’s access URL as well. This is what you are going to give to your agents to use Amazon Connect.
Now we are in the control panel, we are going to skip the setup wizard.
Phone Numbers
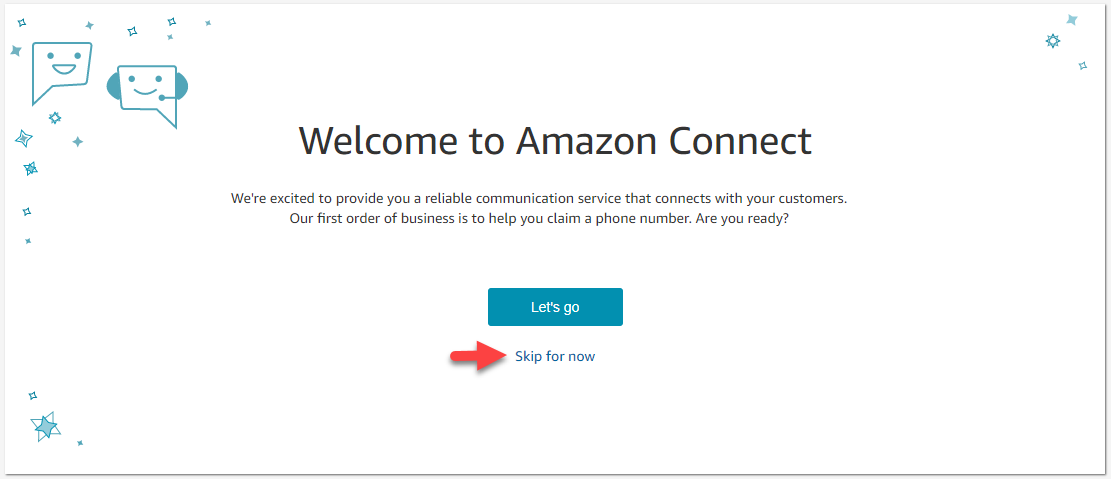
First, we are going to claim a phone number, this number will be used for incoming and outgoing calls to our support contact centre. Go to the Phone Numbers page under Routing.
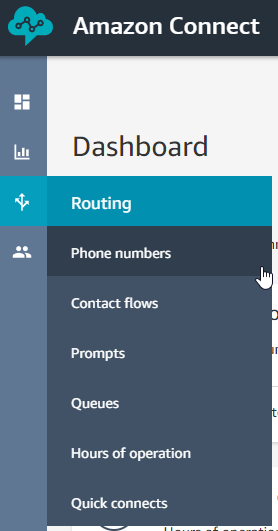
Simply choose a Toll-free or DID number you like and click Save.
Hours of Operation
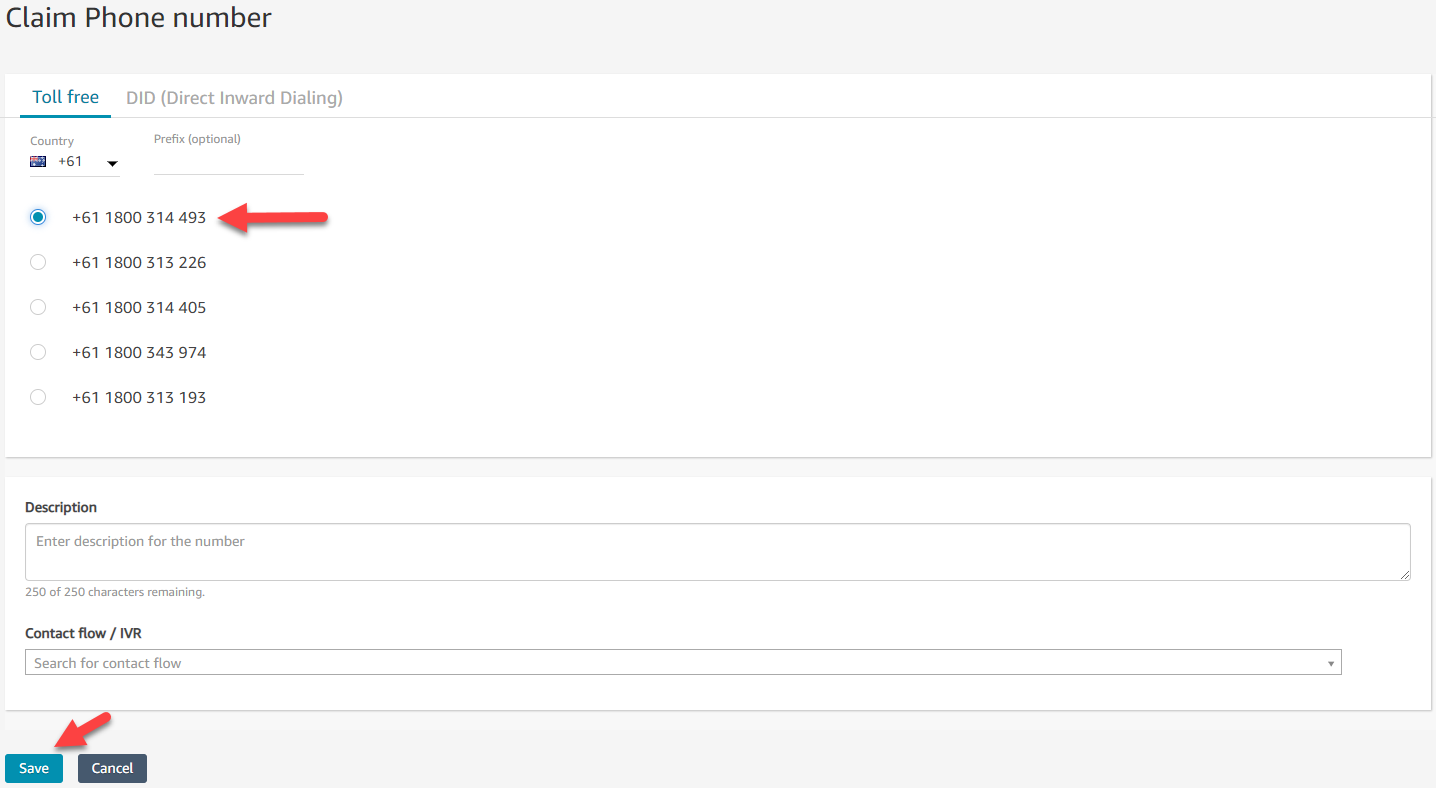
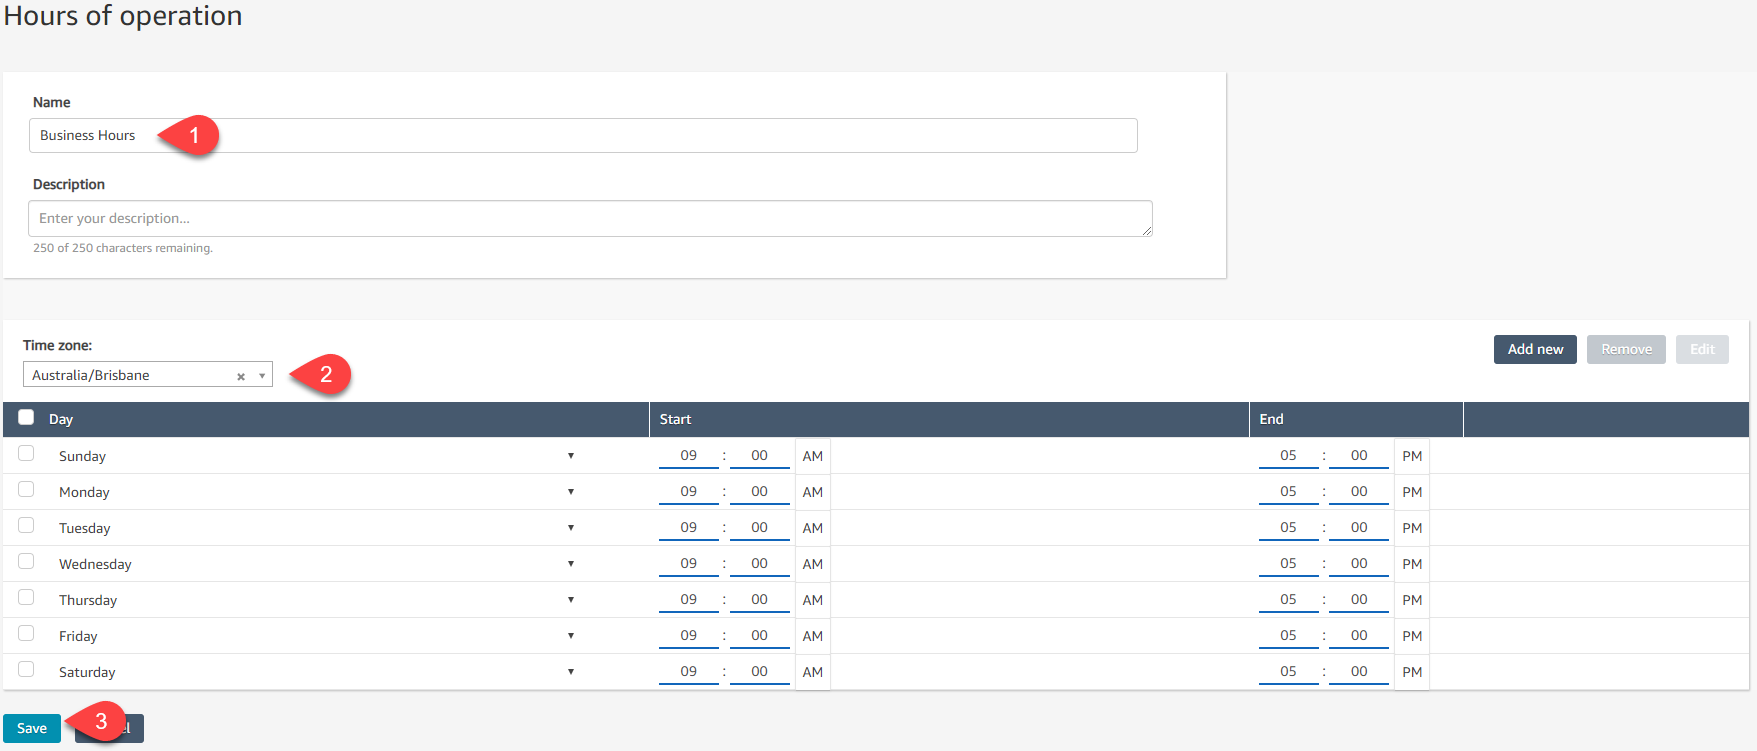
Next, we are going to configure the Hours of Operation, these are the hours that our support centre is open for.
Add New Hours.

Specify your hours and don't forget to set the timezone.
Queue
Now we need to create our Support Queue.
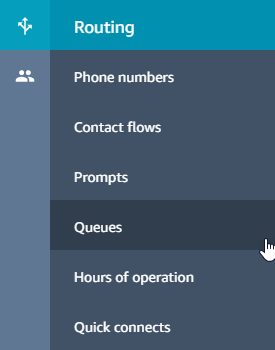
Click Add new queue.

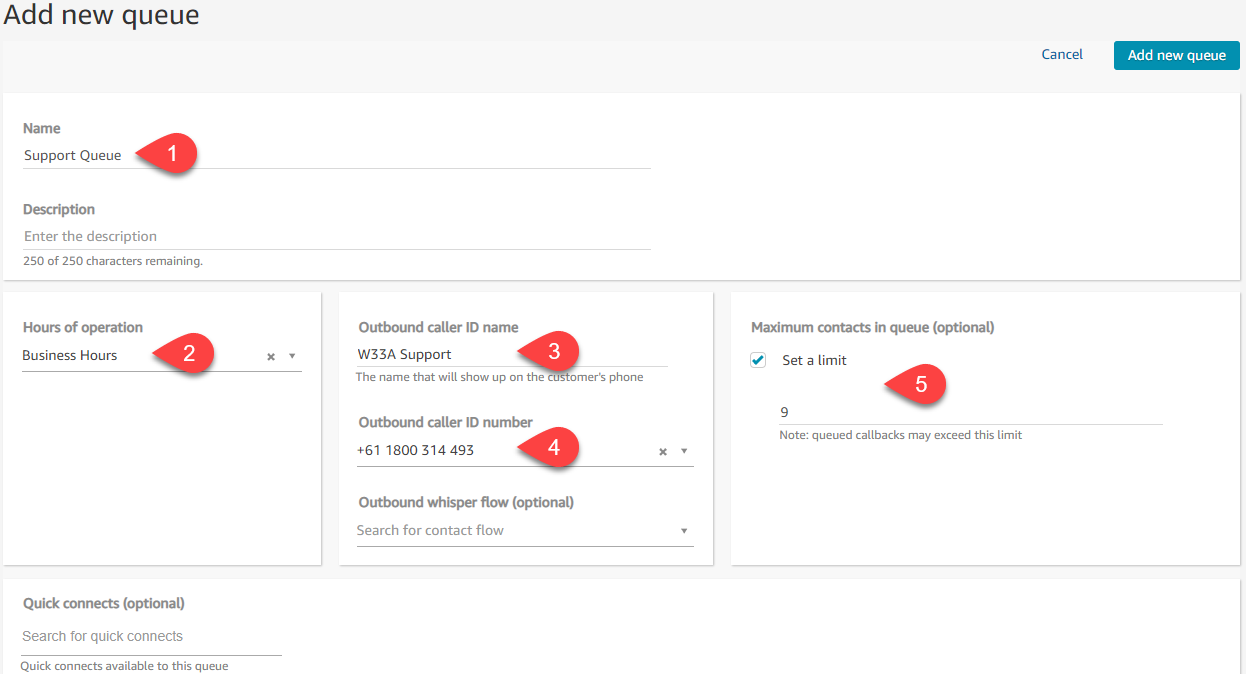
Set our hours of operation, Caller ID and Outbound number.
We are also going to configure the queue limit. When the limit is reached the next caller will trigger an error state (this will make more sense later).
Flows
Its time for the meat and potatoes of Amazon Connect, Flows.
Flows are basically a workflow that defines the customer experience in your contact centre.
Here are the default flows.
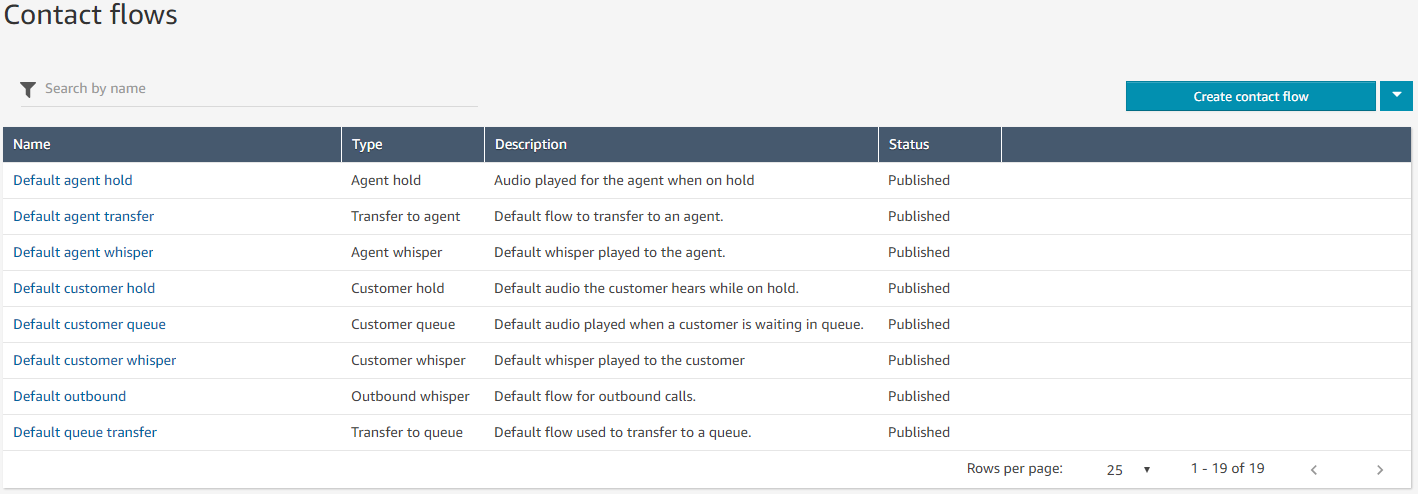
Here you can see we can create a number of flow types.
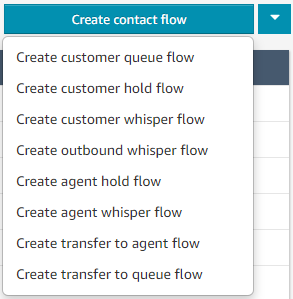
- Contact flows are the generic flow type that defines an inbound contact flow
- Customer queue flows defines what the customer experiences while in the queue before an agent takes their call
- Customer hold flows defines what the customer experiences while on hold
- Customer whisper flows defines what the customer experiences just before they are joined to an agent
- Outbound whisper flows defines what the customer experiences on an outbound call before being connected to the agent
- Agent hold flows defines what the agent experiences when on hold with a customer
- Agent whisper flows defines what the agent experiences as part of an inbound call just before they are joined with a customer
- Transfer to agent flows defines what the agent experiences when transferring to another agent
- Transfer to queue flows defines what the agent experiences when transferring to another queue
The Support Queue Contact Flow
Let’s create our Support Queue contact flow.
We start off with the flow designer, this is a drag and drop interface for defining what happens in a flow (boy does this make things easy).
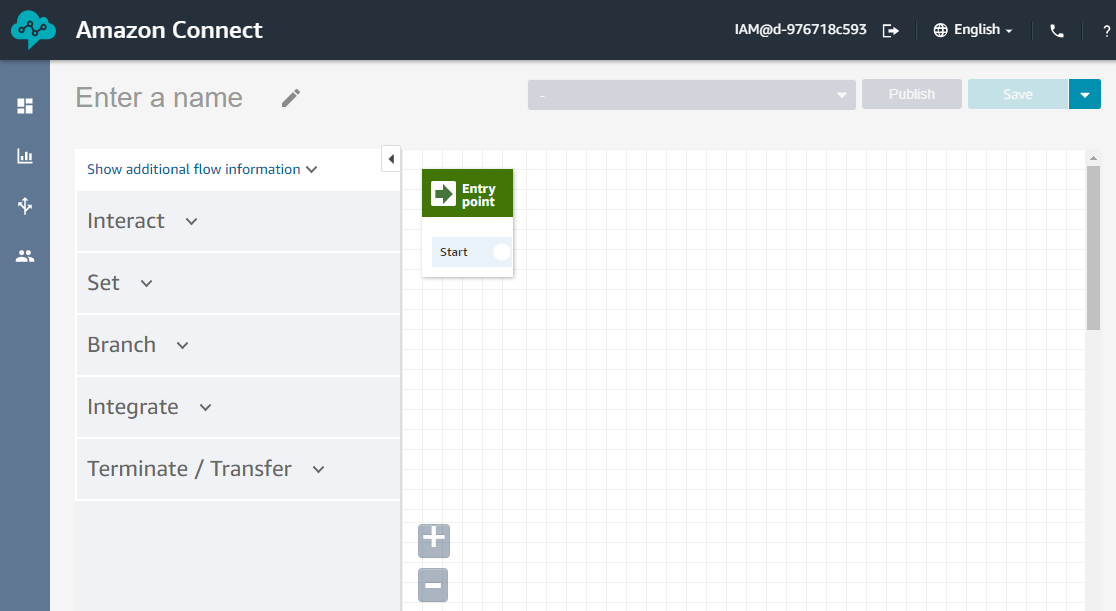
Now what I’m going to do is set a few settings first.
Everything starts at the entry point and follows the connecting lines to the end.
Now all of these settings aren’t required (as you’ll see below we are defining default settings) but I’m going to configure the majority of them to show you what they do.
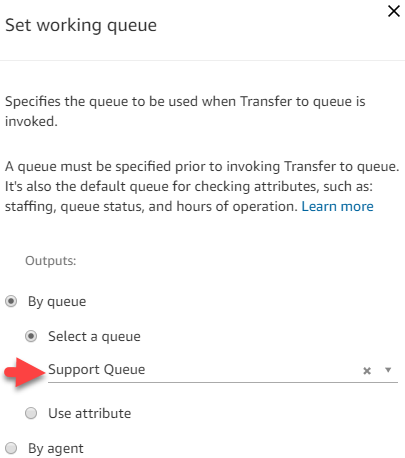
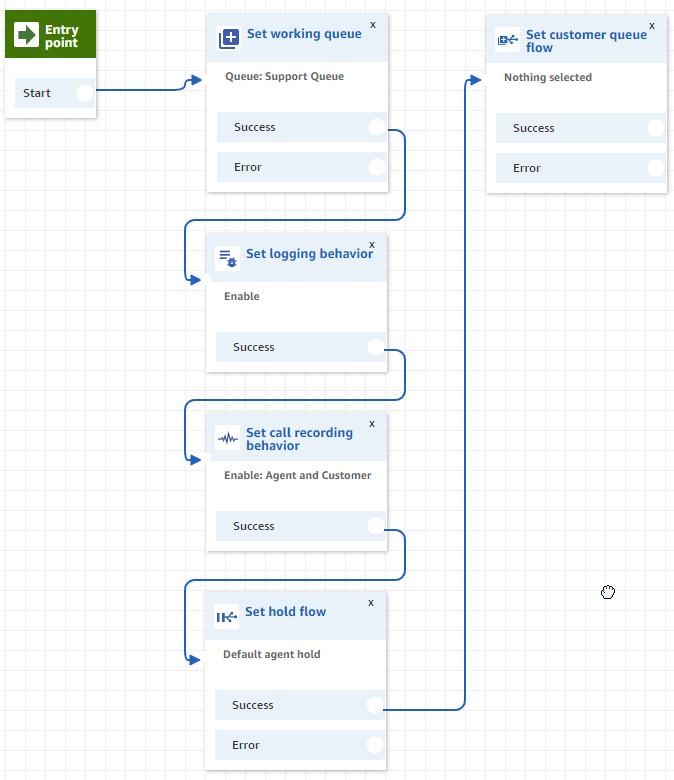
First things first, we are going to define the queue
Grab Set working queue out of the Set menu and drag it onto the main flow window.
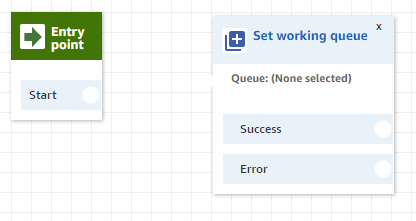
Now we are going to link things up
Click and drag from the entry point to the module, it will auto-connect up to make things easy for you.
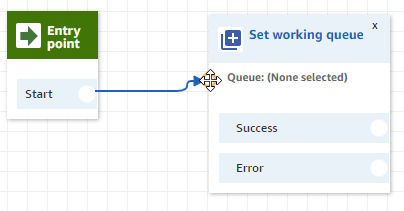
When we click on the module’s title, it will open up the settings panel on the right.
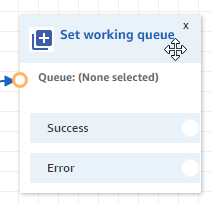
Here we will set the queue (make sure you click save down the bottom of the settings panel when you are done).
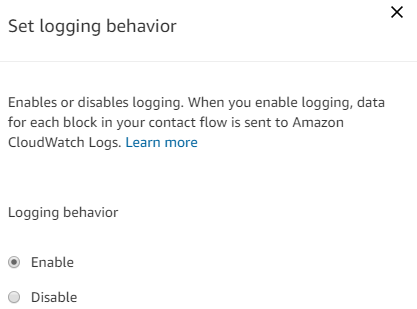
Next, we are going to enable logging, this enables logging for the flow to CloudWatch. This lets you see everything that happened to a stream (call or chat) going through the system.
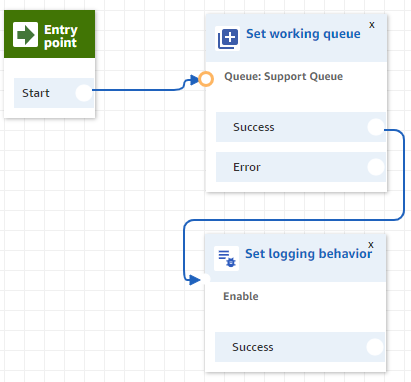
Click the module title to get to the settings.
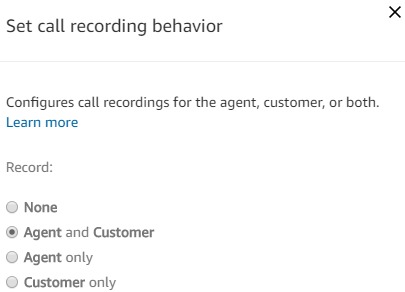
Next module enables call recording, these recordings are stored in S3.
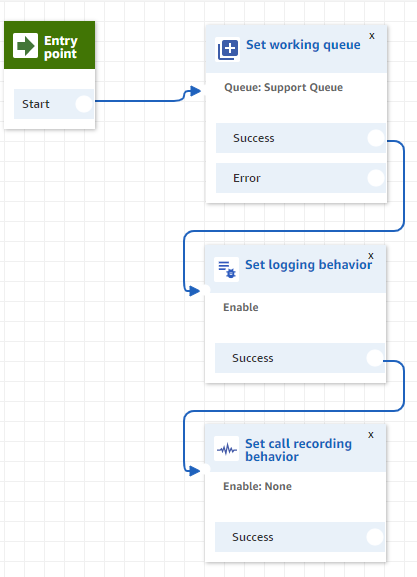
Click the module title to get to the settings.
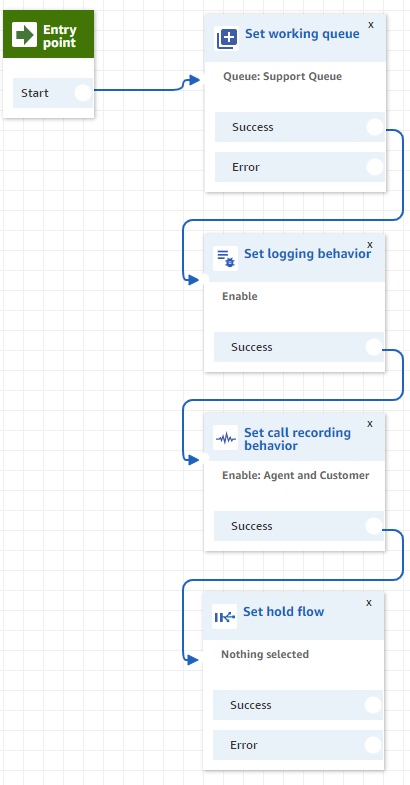
Next, we are going to set the hold flow, this is where you can start to see where the different flow types come together.
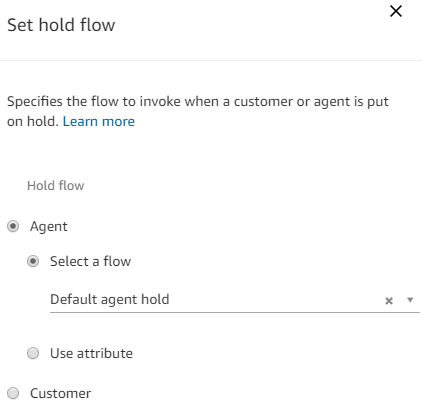
Here we are going to set the hold flow for the agent to the Default agent hold flow.
Click the module title to get to the settings.
Here is what the Default agent hold flow looks like.
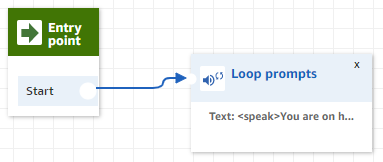
As you can see this is a simple flow that is just telling the agent “You are on hold”.
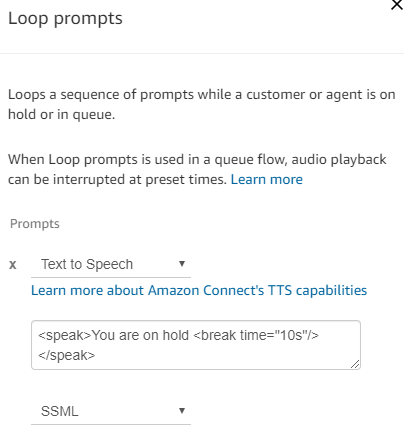
Now, you may be asking, but you haven’t specified a hold flow configuration for the customer?
Correct we haven’t. Whenever we don’t set these flow settings like Hold flow, the Default flow will get used.
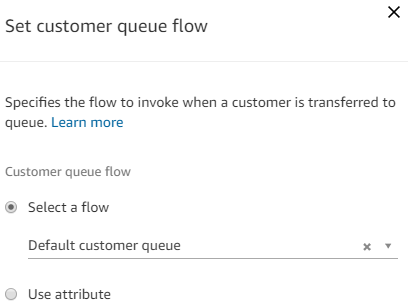
Next, we will set the customer queue flow.
Click the module title to get to the settings.
Then the whisper flow.
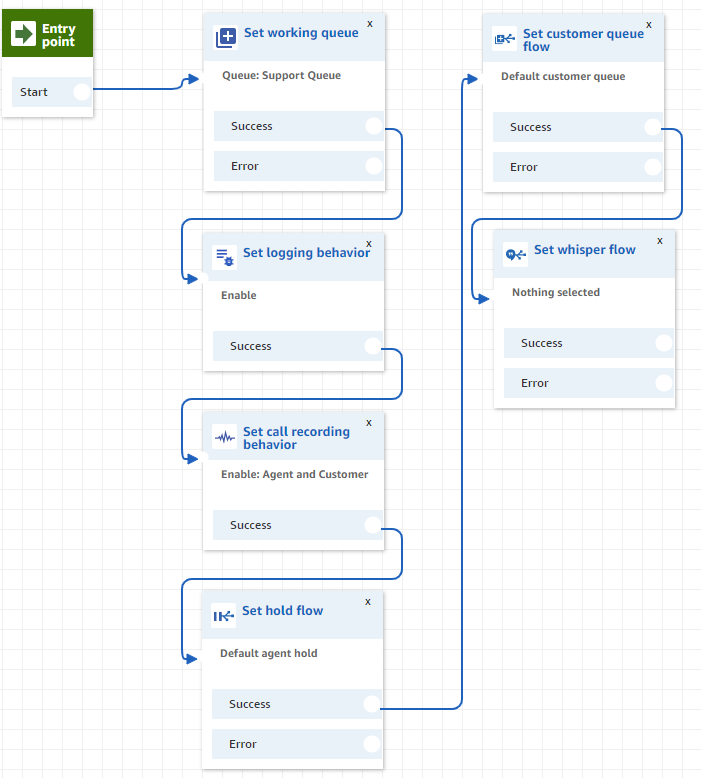
Click the module title to get to the settings.
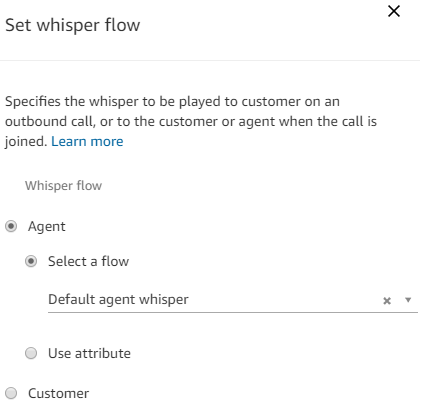
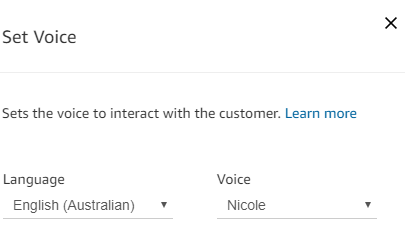
Now we will set the voice, this setting defines what voice Amazon Polly will use when doing and text-to-speech.
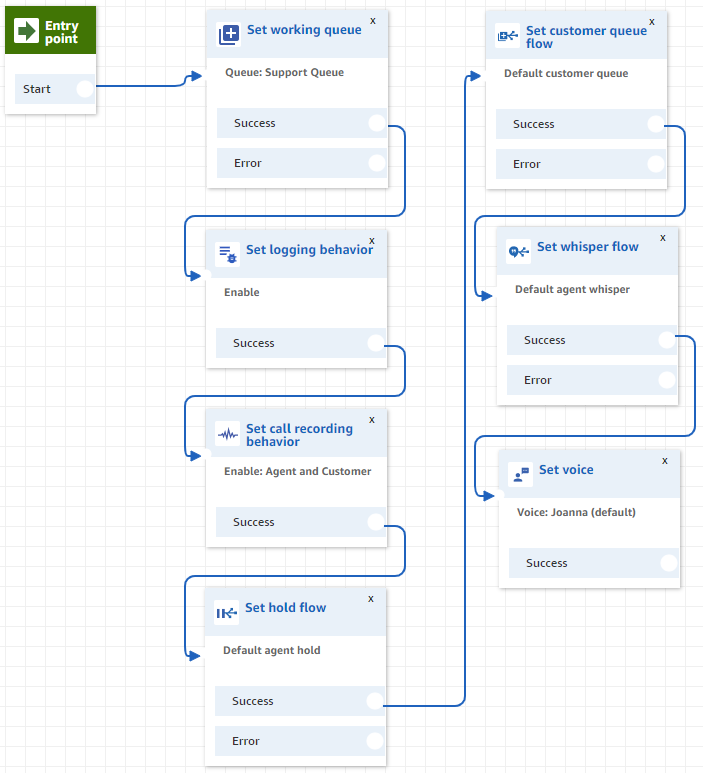
Click the module title to get to the settings.
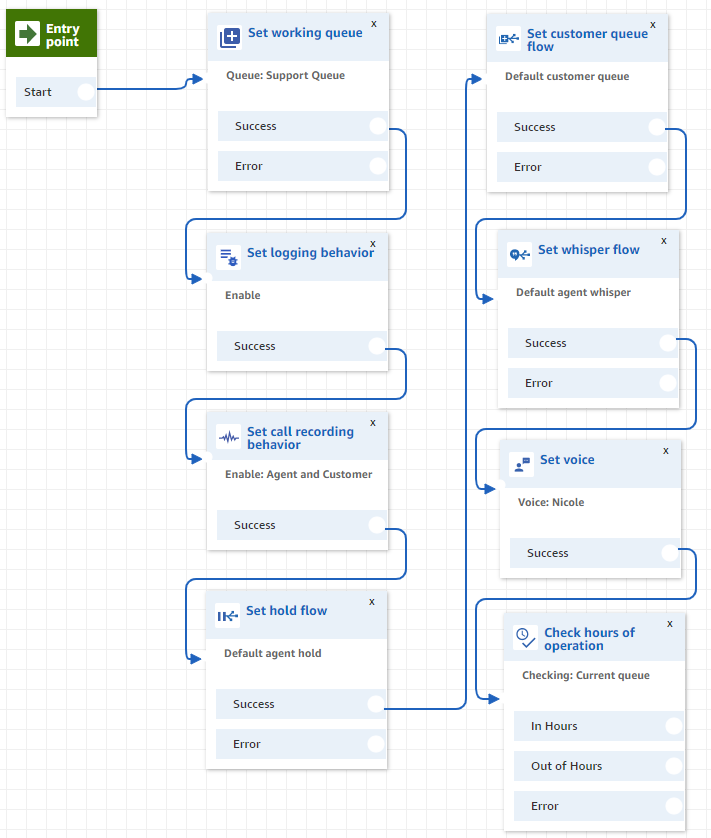
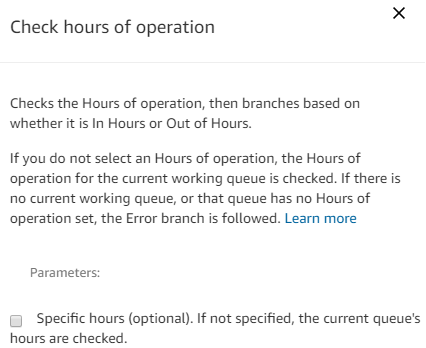
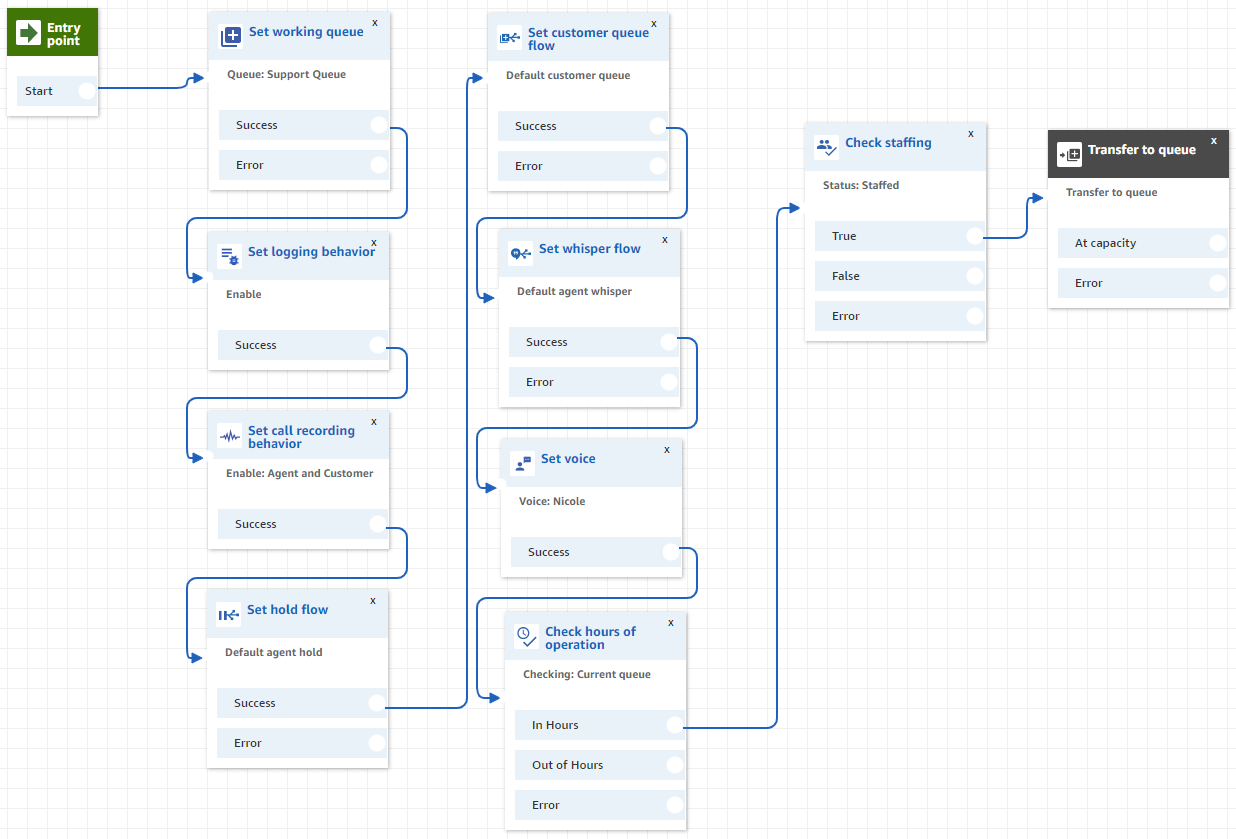
We are going to use some modules from the Branch menu now to start making some decisions, this first one is checking the hours of operation for the queue as we only want to queue calls when we are open.
Click the module title to get to the settings.
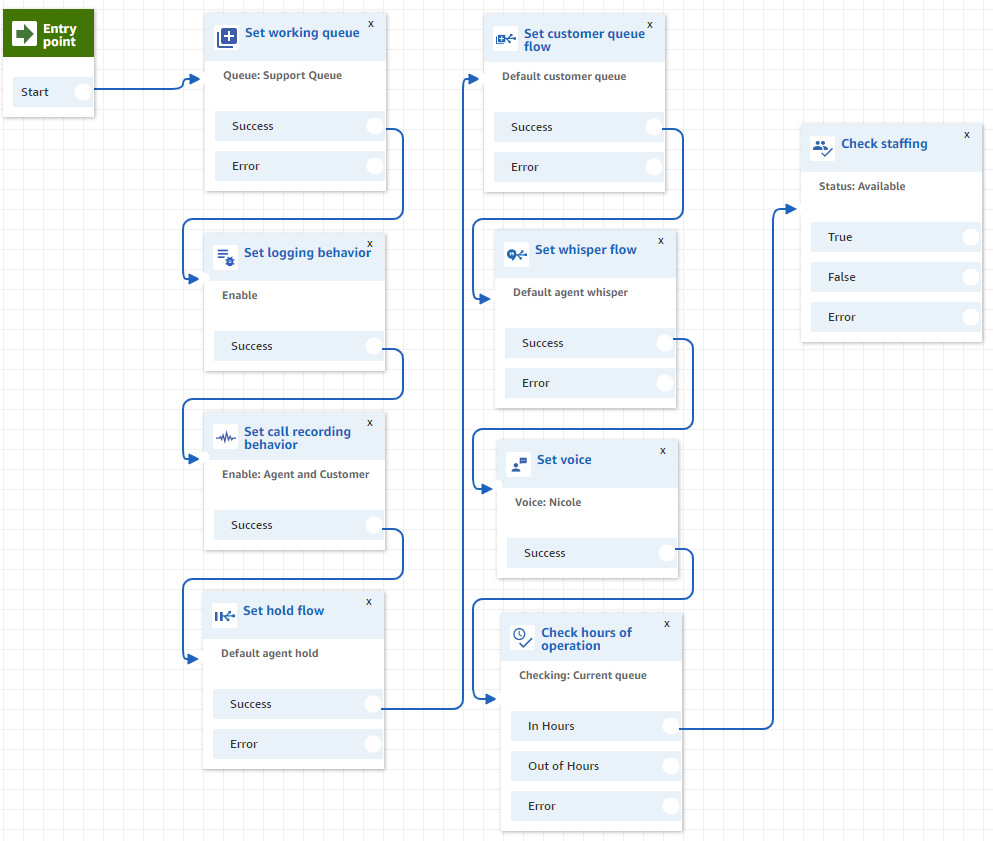
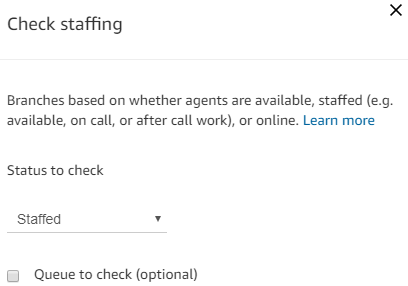
Let’s configure what we are going to do when it’s In Hours, first, let’s check we have staff online and ready to take calls, I’m going to use the Staffed status for this one.
Click the module title to get to the settings.
Now after all of them, we have configured all of our settings, check that we are open and have agents online ready to take calls, we can now transfer the call to the queue.
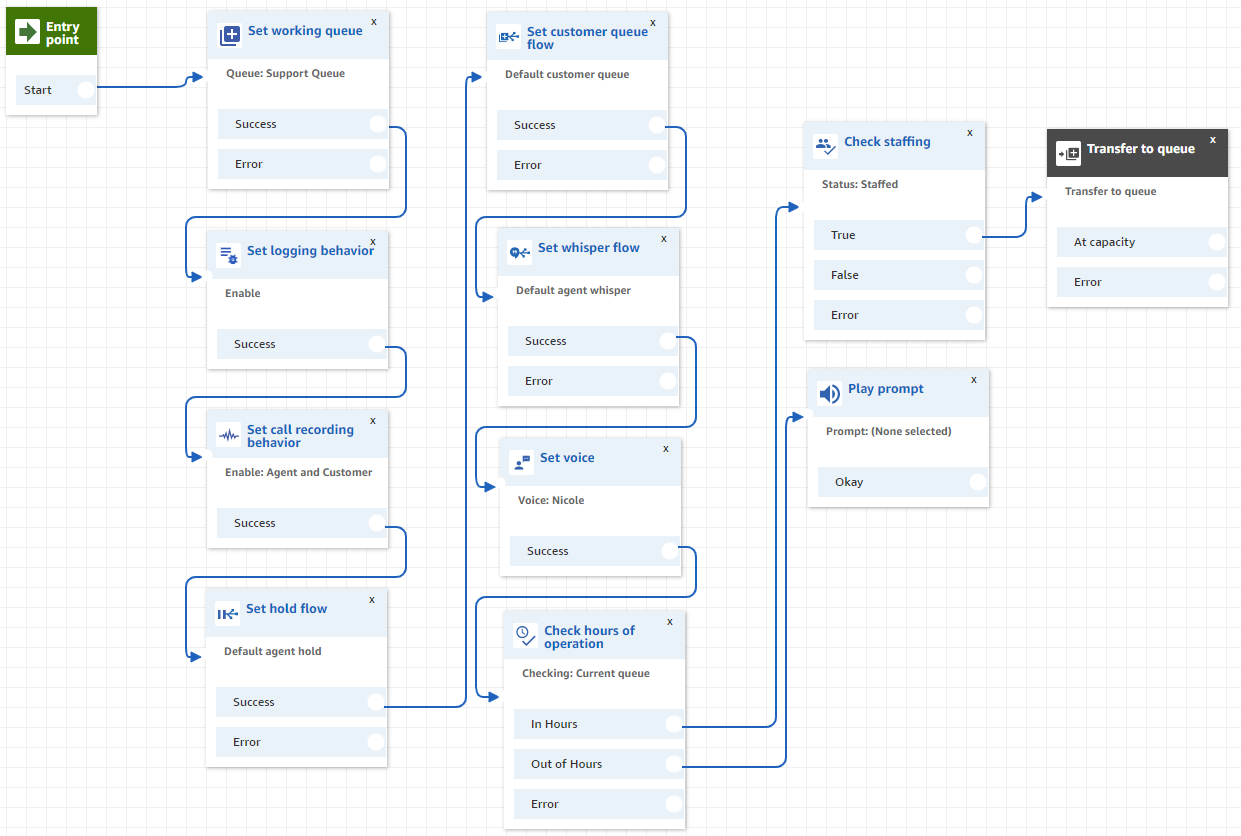
Let’s go back to Out of hours now, we are going to play a prompt to the caller telling them to call back during business hours.
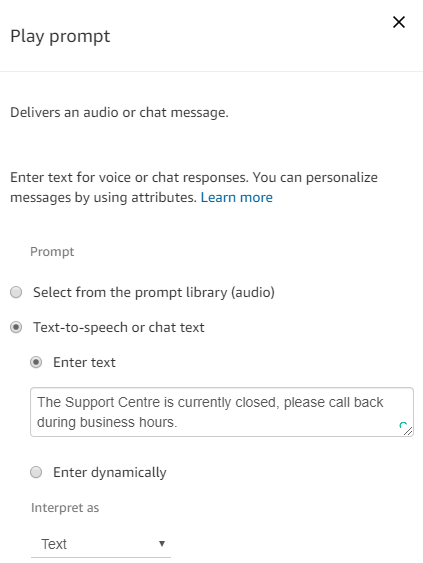
Click the module title to get to the settings.
Then we will hang up.
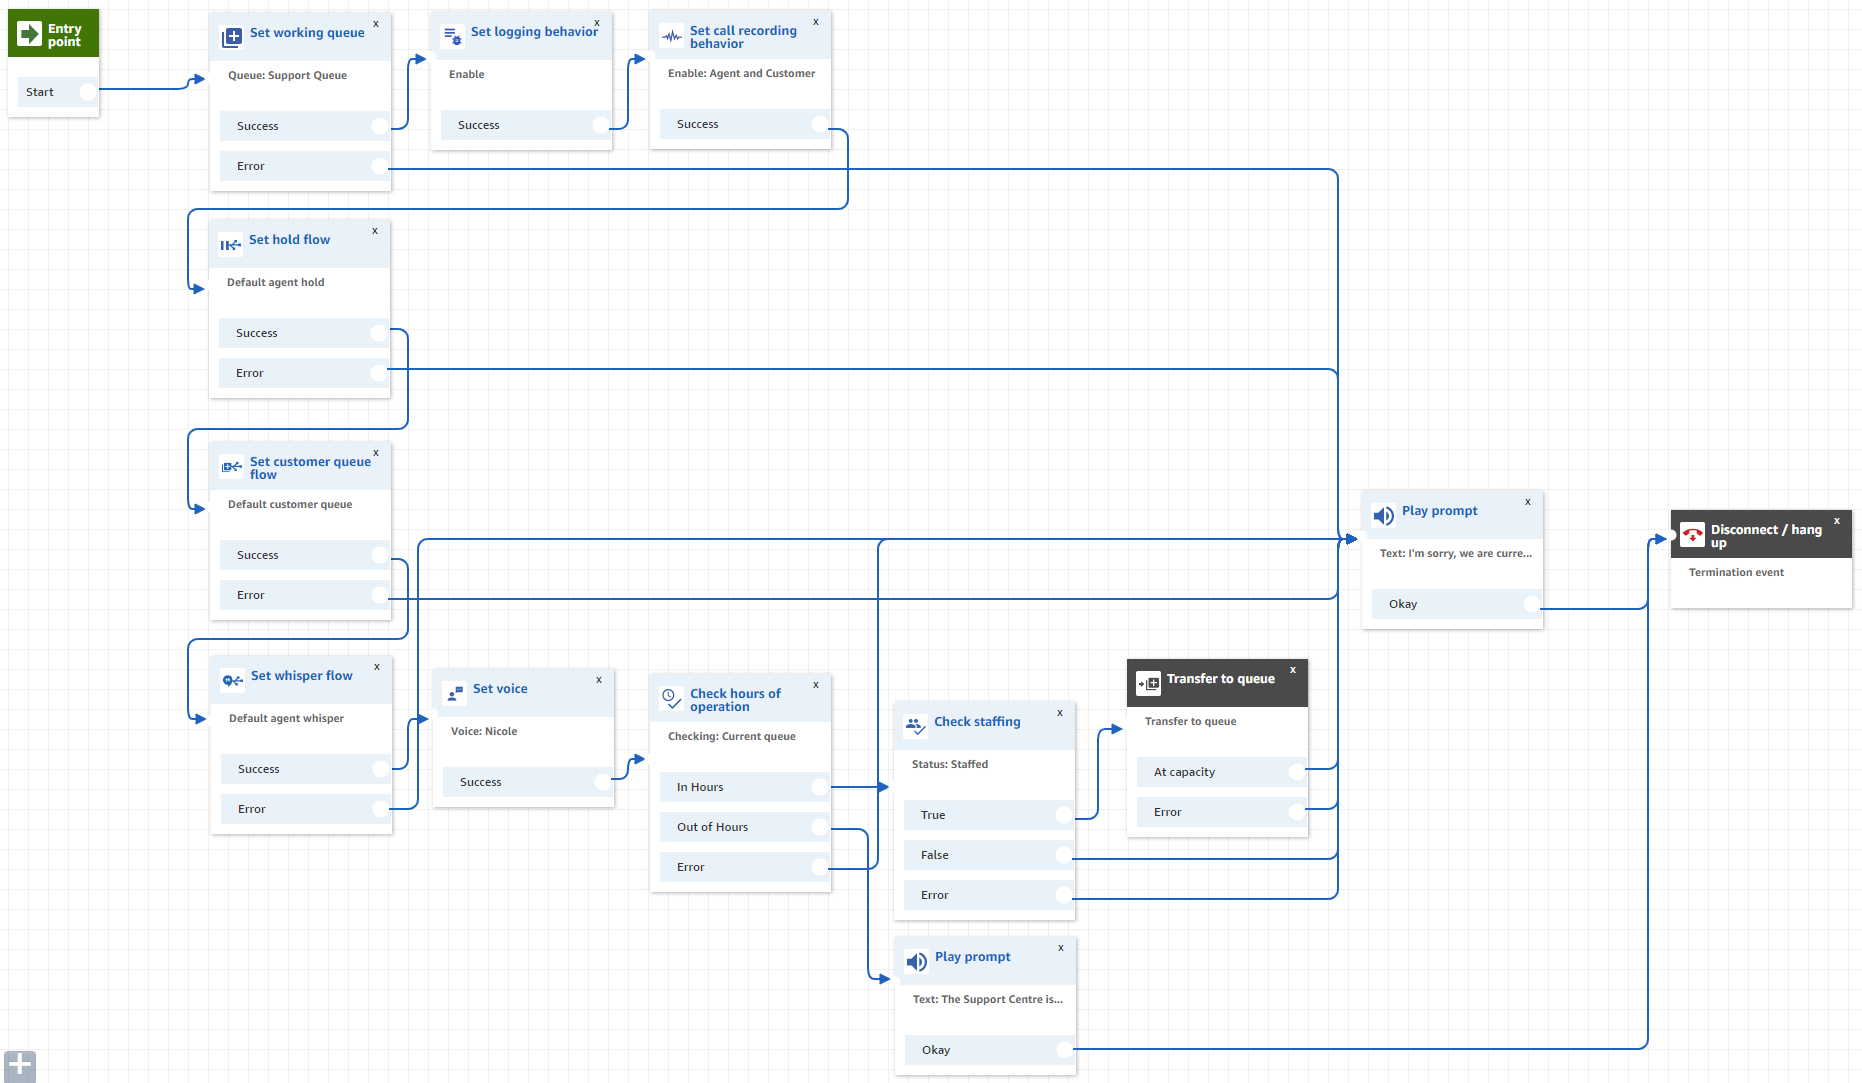
Now if we have an error along the way setting some settings, or we have no staff available, or our queue is at capacity, we are going to play a message saying sorry we are too busy and to please call back later.
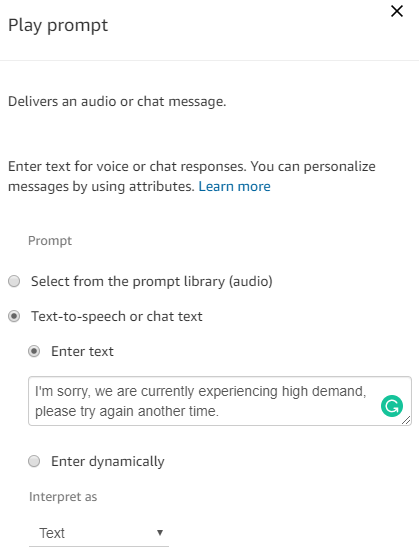
Now we can obviously handle these errors and full queues a different way (such as taking peoples numbers so we can do callbacks when the queue is at capacity) but this gives you an idea of what is possible with Amazon Connect.
Once again, after playing that prompt we will disconnect the call.
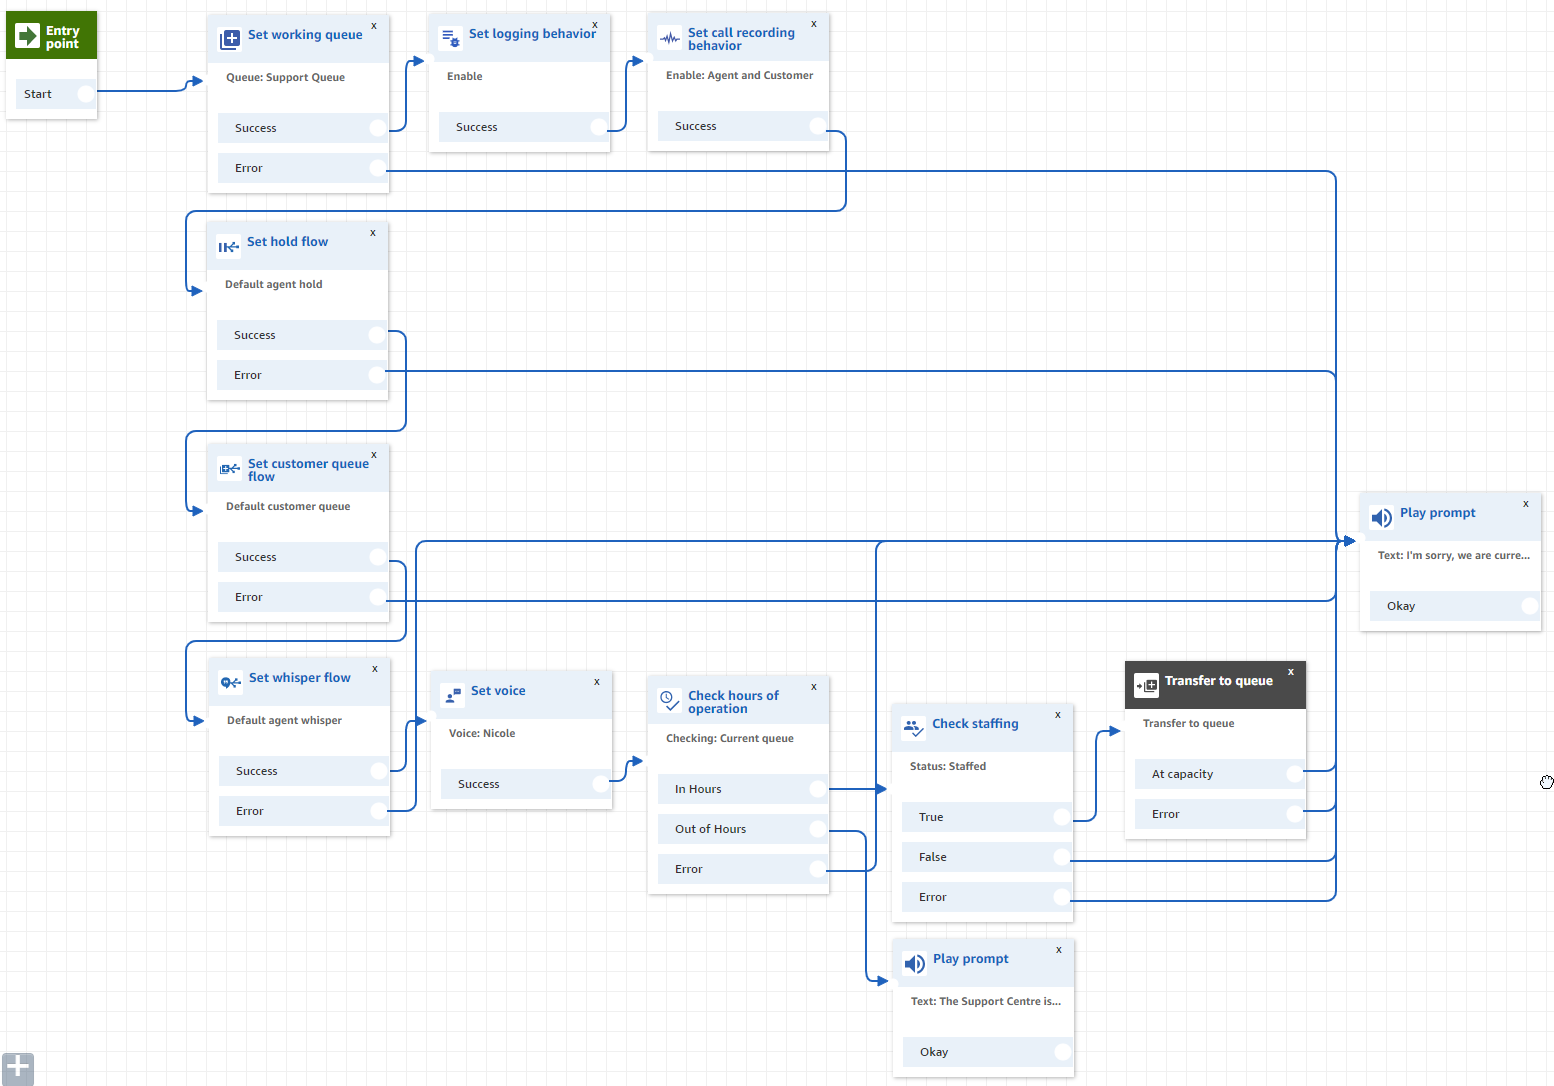
Now we just need to save and publish the flow.

Call Routing Configuration
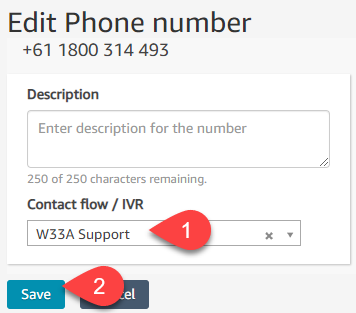
Let’s point the phone number we got at our support contact flow.
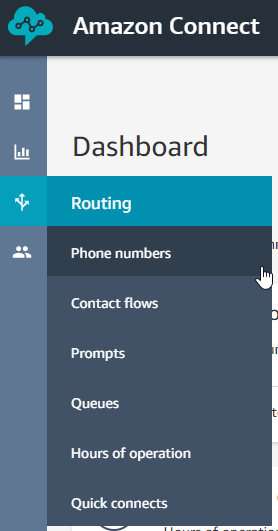
Click on the phone number we are using.

Set the Contact Flow.
Routing Profiles
Then we need to create a routing profile, these profiles are assigned to agents and tell connect what queues the agent works on.
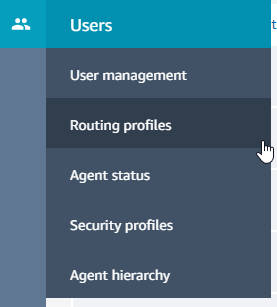
Click Add new profile.
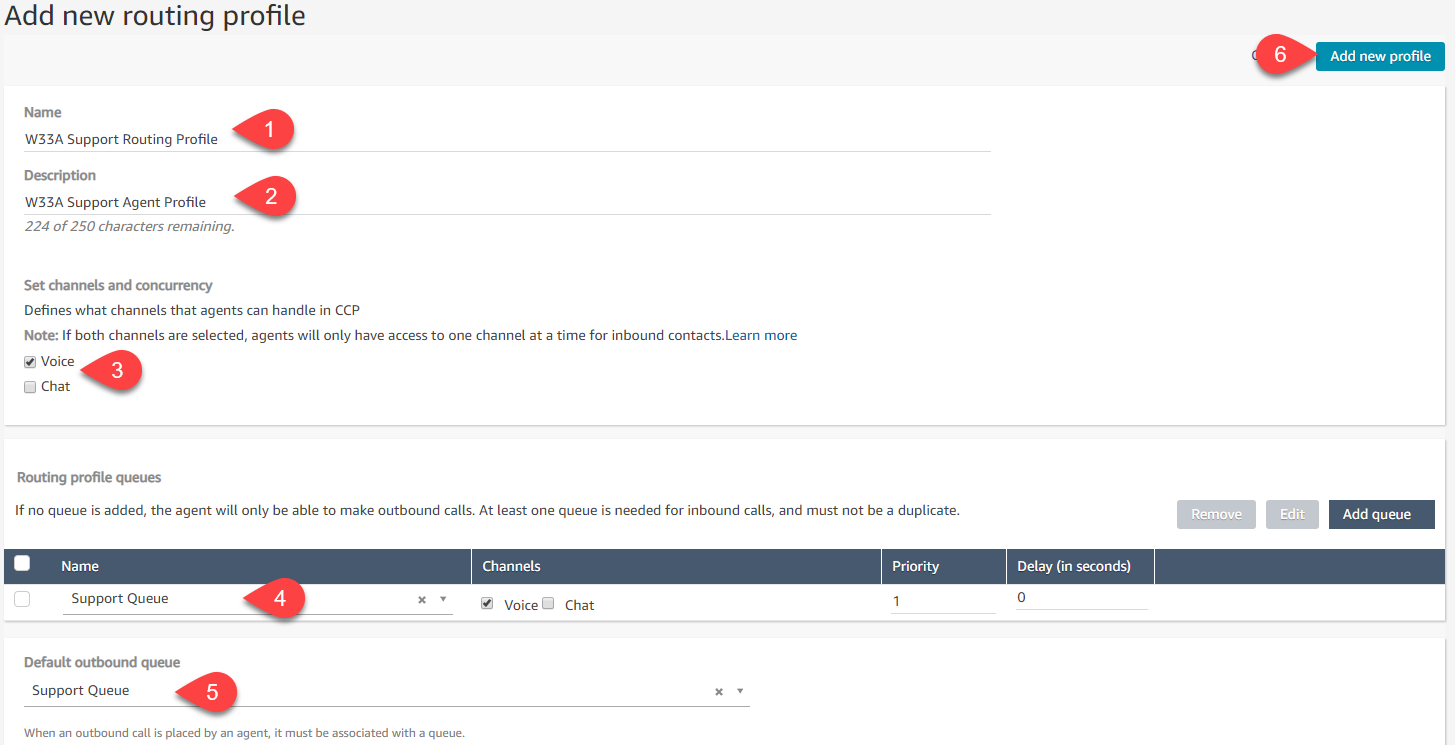
Specify the setting for the routing profile.
The default outbound queue is used when the agent makes an outbound call.

Creating an Agent
We can also create our agent so they can start taking our support calls.
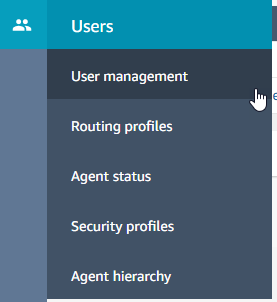
Click Add new users.

You can add them one by one or multiple at a time.
If you have configured directory integration, you can select the users here.

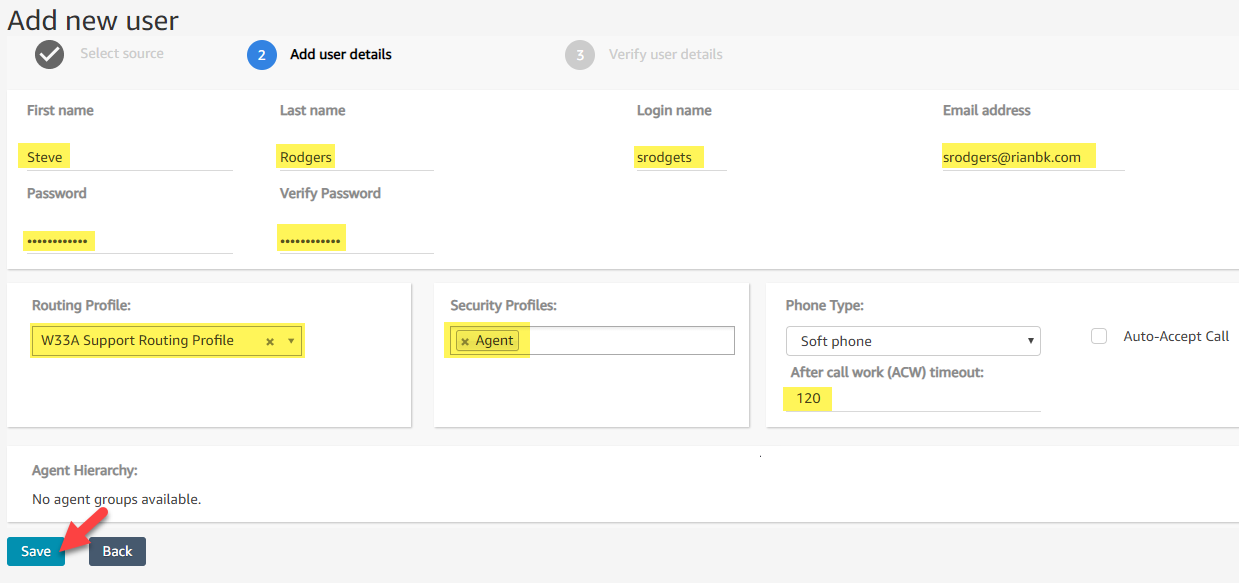
Fill out the users details, configure a routing profile.
The Security Profile defines what the user can do.
- Admin - Grants administrators permission to perform all actions
- Agent - Lets the agent use the Contact Control Panel
- CallCenterManager - Grants manager permission to perform actions related to user management, metrics and routing
- QualityAnalyst - Grants analysts permission to perform actions related to metrics
The After call work timeout (in seconds) defines how long after a call the agent is automatically set to be available to take another call.
Contact Control Panel (CCP)
Lets login to the Amazon Connect URL we got given all the way at the start after we created the instance.
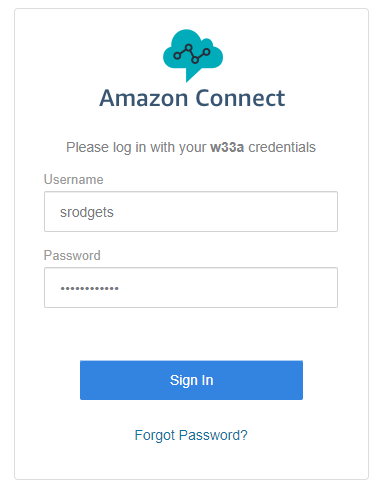
Now that we are logged in, we need to set our status to available, telling Amazon Connect we are ready to take calls. When you first login you are set to Offline.
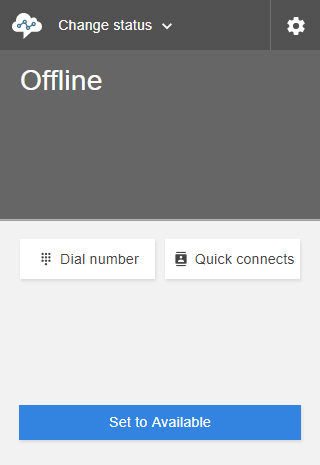
After clicking the Set to Available button, you are ready to start taking calls in your queue.
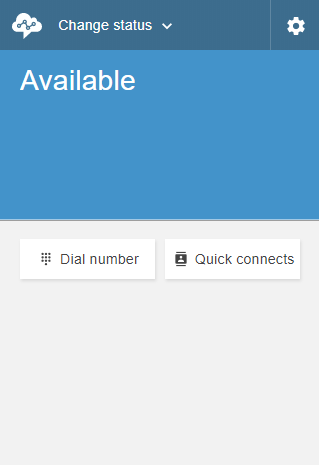
Now we are ready to answer our first call.
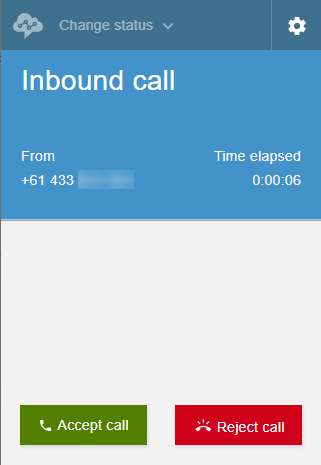
Click the Accept call button to take the call.
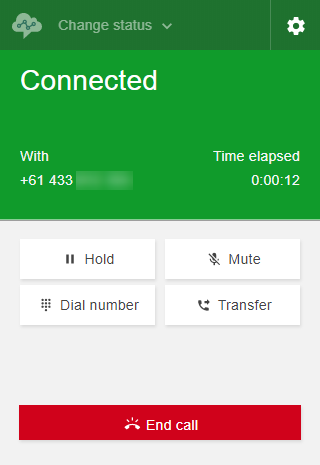
When your done, End the call.
Comments ()